AI-Powered Support
Support doesn't scale when every ticket requires manual attention. AI-powered support in Mantle lets you create intelligent agents that automatically analyze tickets, suggest responses, and handle routine inquiries—so your team can focus on the conversations that truly need a human touch.
What are AI agents?
AI agents are intelligent assistants you configure to handle specific parts of your support workflow. Each agent has a mandate (instructions that define its purpose), tools (capabilities like searching docs or getting customer data), and jobs (automated tasks triggered by events).
Think of agents as specialized team members: one might handle tier-1 support questions using your documentation, while another analyzes customer sentiment across tickets to surface insights.
Key concepts
Mandate — The core instructions that define what your agent does. Write clear, specific guidance about the agent's role, tone, and responsibilities. For example: "You are a helpful customer support agent. Be empathetic, solution-focused, and always reference relevant documentation."
Tools — Capabilities you grant to your agent. Built-in tools include searching your docs, getting customer information, viewing subscriptions, and accessing ticket history. You can also connect external services through Model Context Protocols (MCPs).
Jobs — Automated tasks the agent performs when triggered by specific events. A job combines a trigger (like "customer message received") with actions (like "create ticket response suggestion" or "send Slack notification").
Rules — Additional guidelines that shape how your agent responds. Use rules to define tone, formatting preferences, or specific responses for common scenarios.
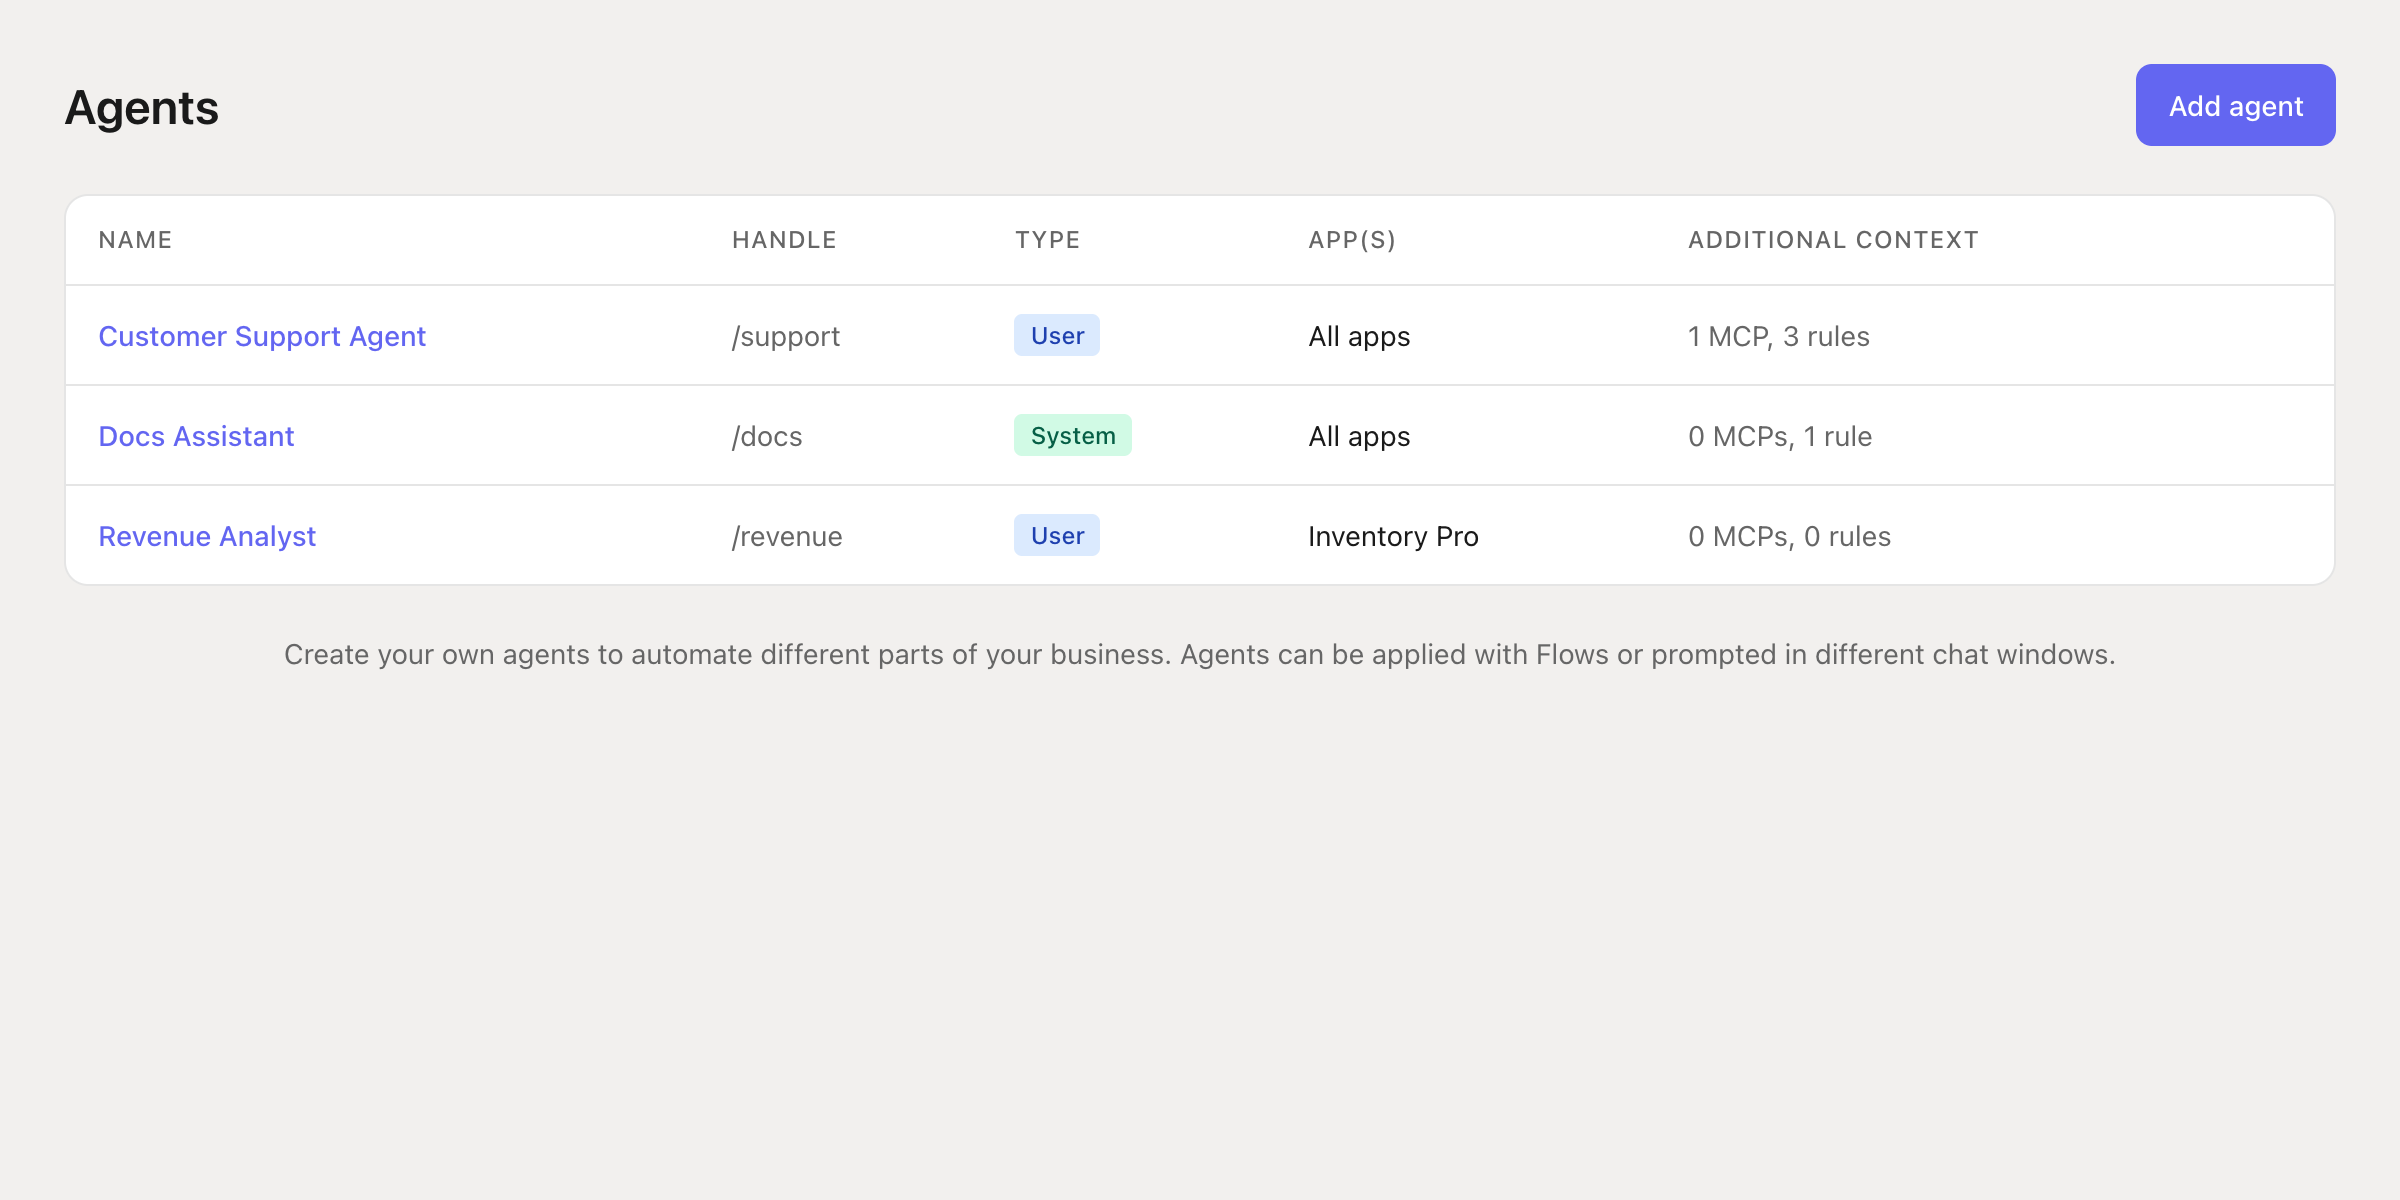
Creating your first agent
Navigate to Agents in your Mantle dashboard and click Add agent. You'll configure:
Name and handle — Give your agent a clear name and a short handle (like
/support) for referencing it in chat and Flows.Apps — Choose which apps this agent can access data from. Select "All apps" for a general-purpose agent, or limit to specific apps for specialized agents.
Chat enabled — Allow team members to interact with this agent directly in the Mantle chat interface.
Visibility — Control who can use this agent: everyone in your organization, specific roles, or just yourself.
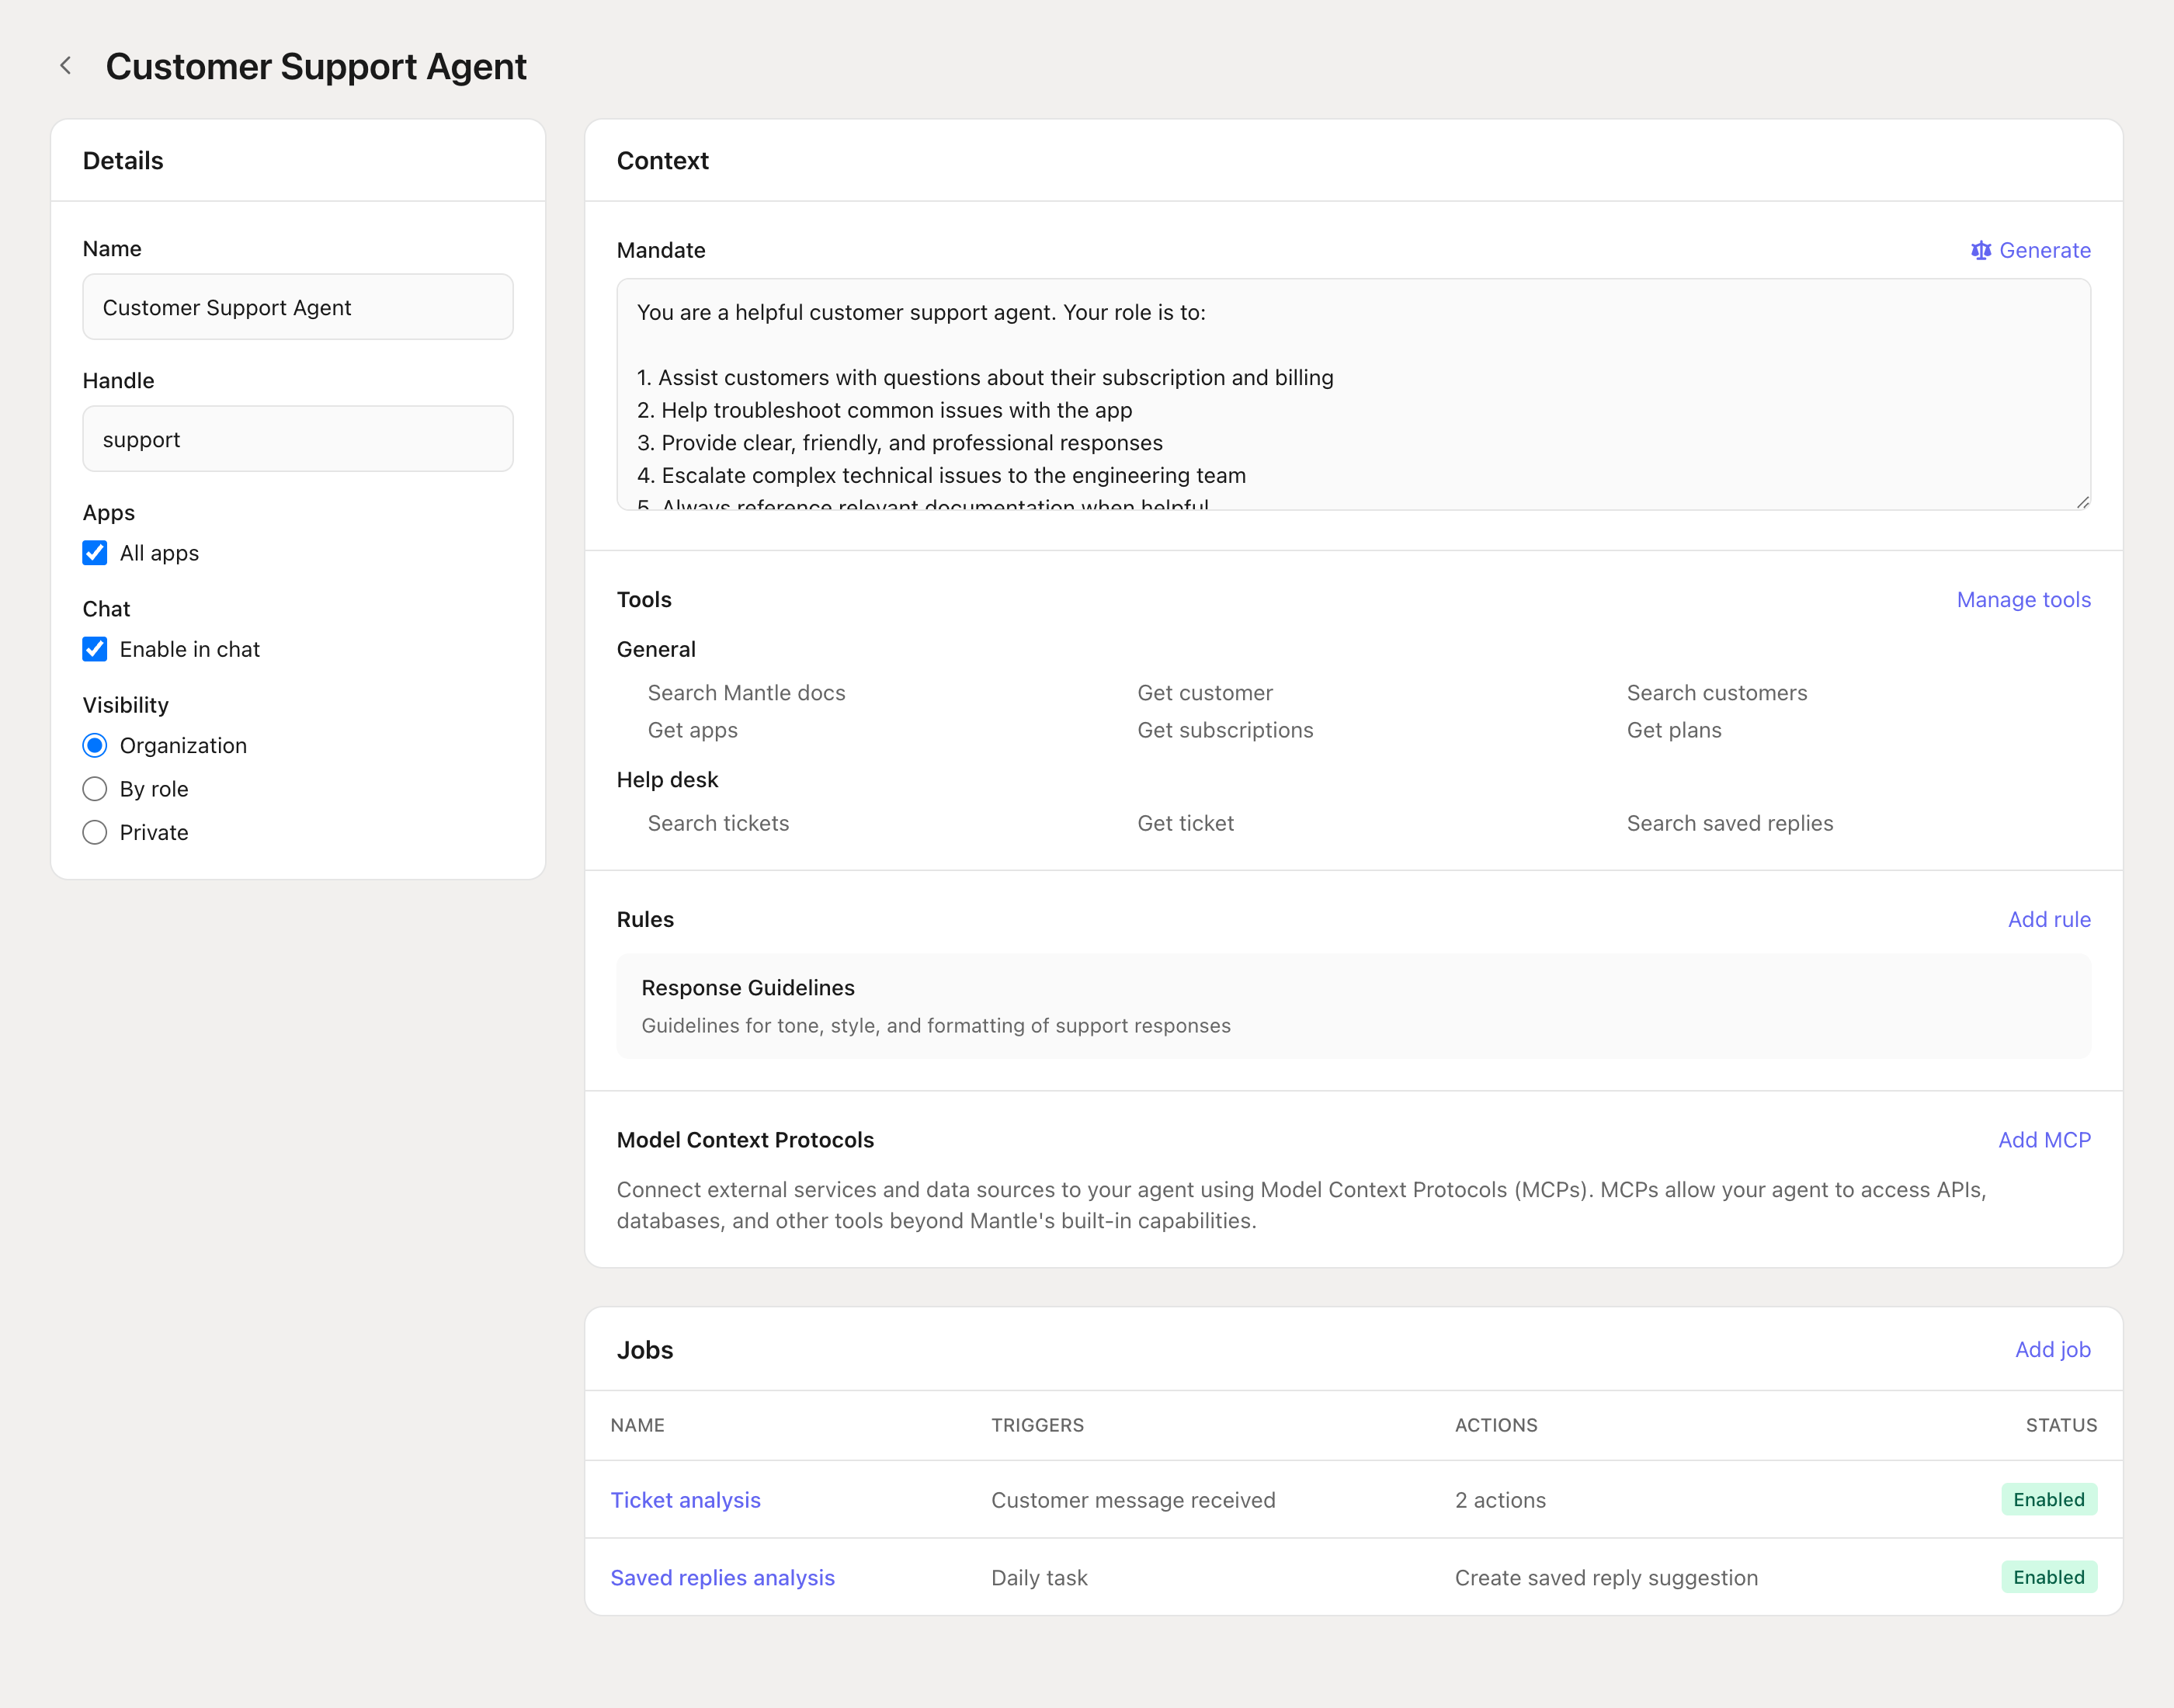
Configuring agent context
The Context section defines everything your agent knows and can do.
Mandate
Write detailed instructions for your agent. Be specific about:
The agent's primary responsibilities
How it should interact with customers
What types of issues it should handle vs. escalate
Any specific procedures or policies to follow
Pro tip: Use the Generate button to have AI help draft your mandate based on a description of what you want the agent to do.
Tools
Click Manage tools to select which capabilities your agent has access to. Tools are organized by category:
| Category | Example tools |
|---|---|
| General | Search Mantle docs, get customer, search customers, get apps, get subscriptions |
| Help desk | Search tickets, get ticket, search saved replies, create ticket response suggestion |
| Metrics | MRR metrics, churn metrics, subscription analytics, customer analytics |
| Actions | Create insight, send Slack notification, send email notification |
Rules
Add rules to provide additional context or constraints. Rules are great for:
Response formatting guidelines (always include a greeting, sign off with agent name)
Tone and style preferences (friendly but professional, avoid jargon)
Handling specific scenarios (if customer mentions cancellation, always offer to connect with retention team)
Model Context Protocols (MCPs)
Connect external services and data sources through MCPs. This lets your agent access APIs, databases, and other tools beyond Mantle's built-in capabilities—like querying your own backend or accessing third-party services.
Setting up agent jobs
Jobs automate your agent's work by connecting triggers to actions. In the Jobs section, click Add job to create one.
Available triggers
| Trigger | When it fires |
|---|---|
| Customer message received | When a customer sends a new message on a ticket |
| Help desk ticket created | When a new ticket is created |
| Help desk ticket updated | When a ticket is modified |
| Daily task | Once per day at a scheduled time |
| Weekly task | Once per week at a scheduled time |
| Customer uninstalled | When a customer uninstalls your app |
| Docs page created/updated | When documentation changes |
Common job patterns
Automatic ticket analysis: Trigger on "Customer message received" and have the agent analyze the ticket, then create a response suggestion for your team to review.
Daily saved replies analysis: Trigger daily to analyze recent tickets and suggest new saved replies that would help your team respond faster.
Churn risk alerts: Trigger on customer events to analyze accounts and send Slack notifications when high-value customers show signs of churning.
Using agents with Flows
For more complex automation, use the Run AI agent action in Flows. This gives you full control over when and how agents run, with the ability to:
Pass dynamic data to the agent using Liquid variables
Define a response schema to extract structured data
Use the agent's output in subsequent Flow steps
Combine with conditions to create sophisticated branching logic
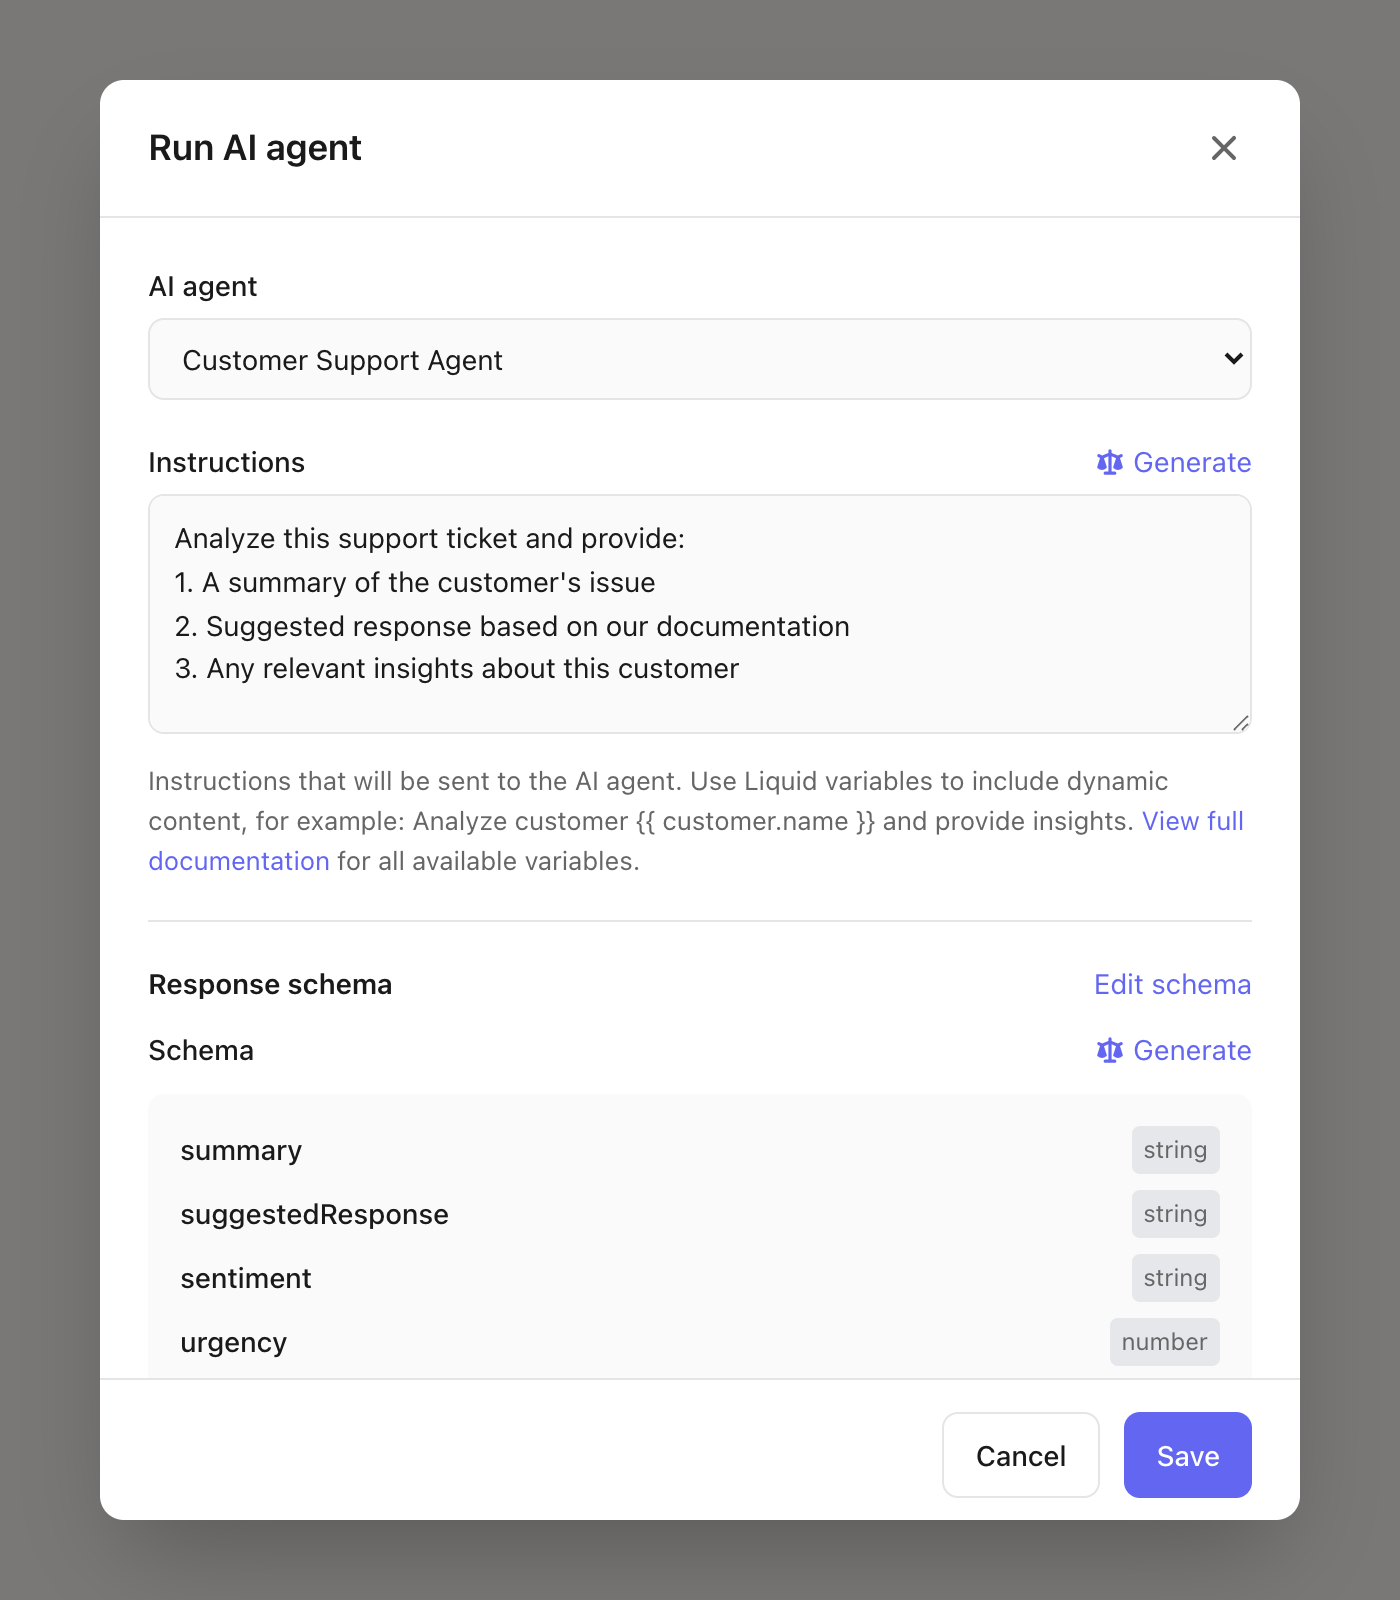
The response schema lets you structure the agent's output so you can use specific values in your Flow. For example, have the agent return a sentiment field and urgency score, then route tickets differently based on those values.
AI-powered chat widget
Connect an AI agent to your chat widget to provide instant, automated responses to customer inquiries. When configured:
Customer sends a message through your support widget
The assigned AI agent analyzes the message and your documentation
Agent generates and sends a response automatically
If the agent can't resolve the issue, it can escalate to a human
To enable this, go to your chat channel settings and select an AI agent under the automation options. The agent will use its configured tools, mandate, and rules to respond to customers.
Response suggestions
When agents create ticket response suggestions, they appear directly in your help desk interface. Support agents can:
Review the AI-generated suggestion
Edit the response before sending
Use the suggestion as-is with one click
Dismiss suggestions that aren't helpful
This keeps humans in the loop while dramatically reducing the time spent drafting responses to common questions.
Best practices
Start with one focused agent. Rather than creating a single agent that does everything, start with a specific use case (like tier-1 support) and expand from there.
Write detailed mandates. The more specific your instructions, the better your agent performs. Include examples of good responses and explicit guidance on tone.
Use rules for consistency. If you have brand guidelines or specific formatting requirements, add them as rules so the agent follows them consistently.
Test before enabling. Use the test mode in job settings to see how your agent responds before enabling it on real tickets.
Review and iterate. Check the suggestions your agents create and refine their mandates based on what works well.
Go further
Support channels — Set up email, chat, and other support channels
Flows — Create automated workflows that include AI agents
Getting started with help desk — Overview of Mantle's help desk features