Support Channels & Elements
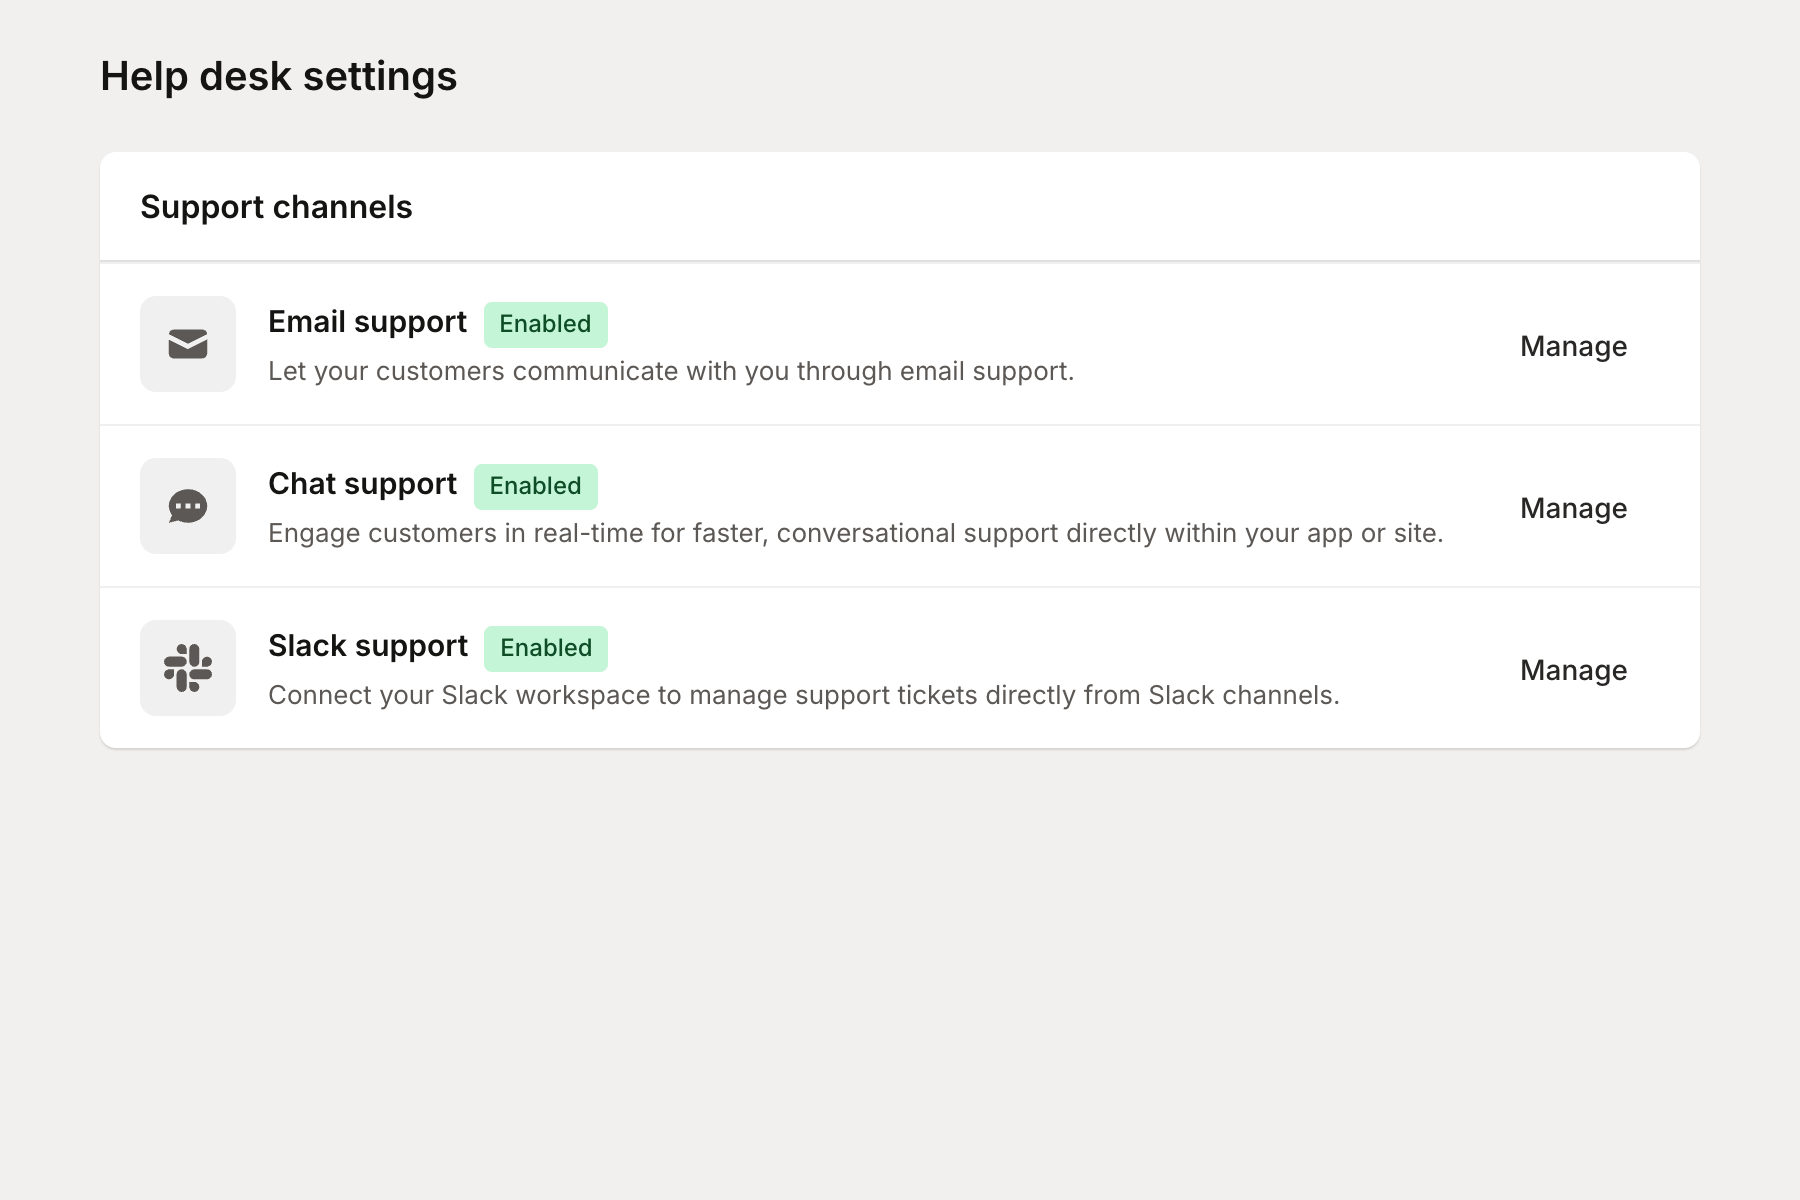
Mantle Helpdesk supports multiple channels for receiving customer support requests, plus elements that extend your helpdesk with integrations to external tools. All messages flow into a single unified inbox where your team can respond.
This guide covers the three support channels and the available elements:
Email — Traditional email support with forwarding and custom domains
Slack — Turn Slack messages into tickets with emoji reactions
Chat — Live chat widget embedded in your app or website
GitHub element — Create GitHub issues from tickets and sync status
Email support
Email is the most traditional support channel. Customers send emails to your support address, and those emails appear as tickets in your Mantle inbox. When your team replies, the response is sent back to the customer via email.
How email support works
Mantle uses email forwarding to receive inbound emails. Here's the flow:
Customer sends an email to your support address (e.g.,
[email protected])Your email provider forwards the message to Mantle's forwarding address
Mantle creates a ticket and matches it to the customer (if known)
Your team responds from the Mantle inbox
The reply is sent from your verified domain back to the customer
Setting up email support
To enable email support, you need to configure two things: email addresses for receiving mail, and domains for sending mail.
Adding an email address
Go to Help Desk > Settings > Channels
Select the Email tab
Click Add email address
Enter a name (e.g., "Support team") and the email address
Optionally associate the address with a specific app
Click Add email address
After adding the address, Mantle generates a unique forwarding address. You'll need to configure your email provider (Gmail, Outlook, etc.) to forward emails to this address.
Adding a sending domain
To send outbound emails from your domain (instead of a generic Mantle address), you need to verify domain ownership:
Click Add domain in the Domains section
Enter your domain name (e.g.,
yourapp.com)Add the required DNS records to your domain:
CNAME records for DKIM authentication
TXT record for DMARC policy
Click Verify domain once DNS records propagate (usually 15 minutes to 24 hours)
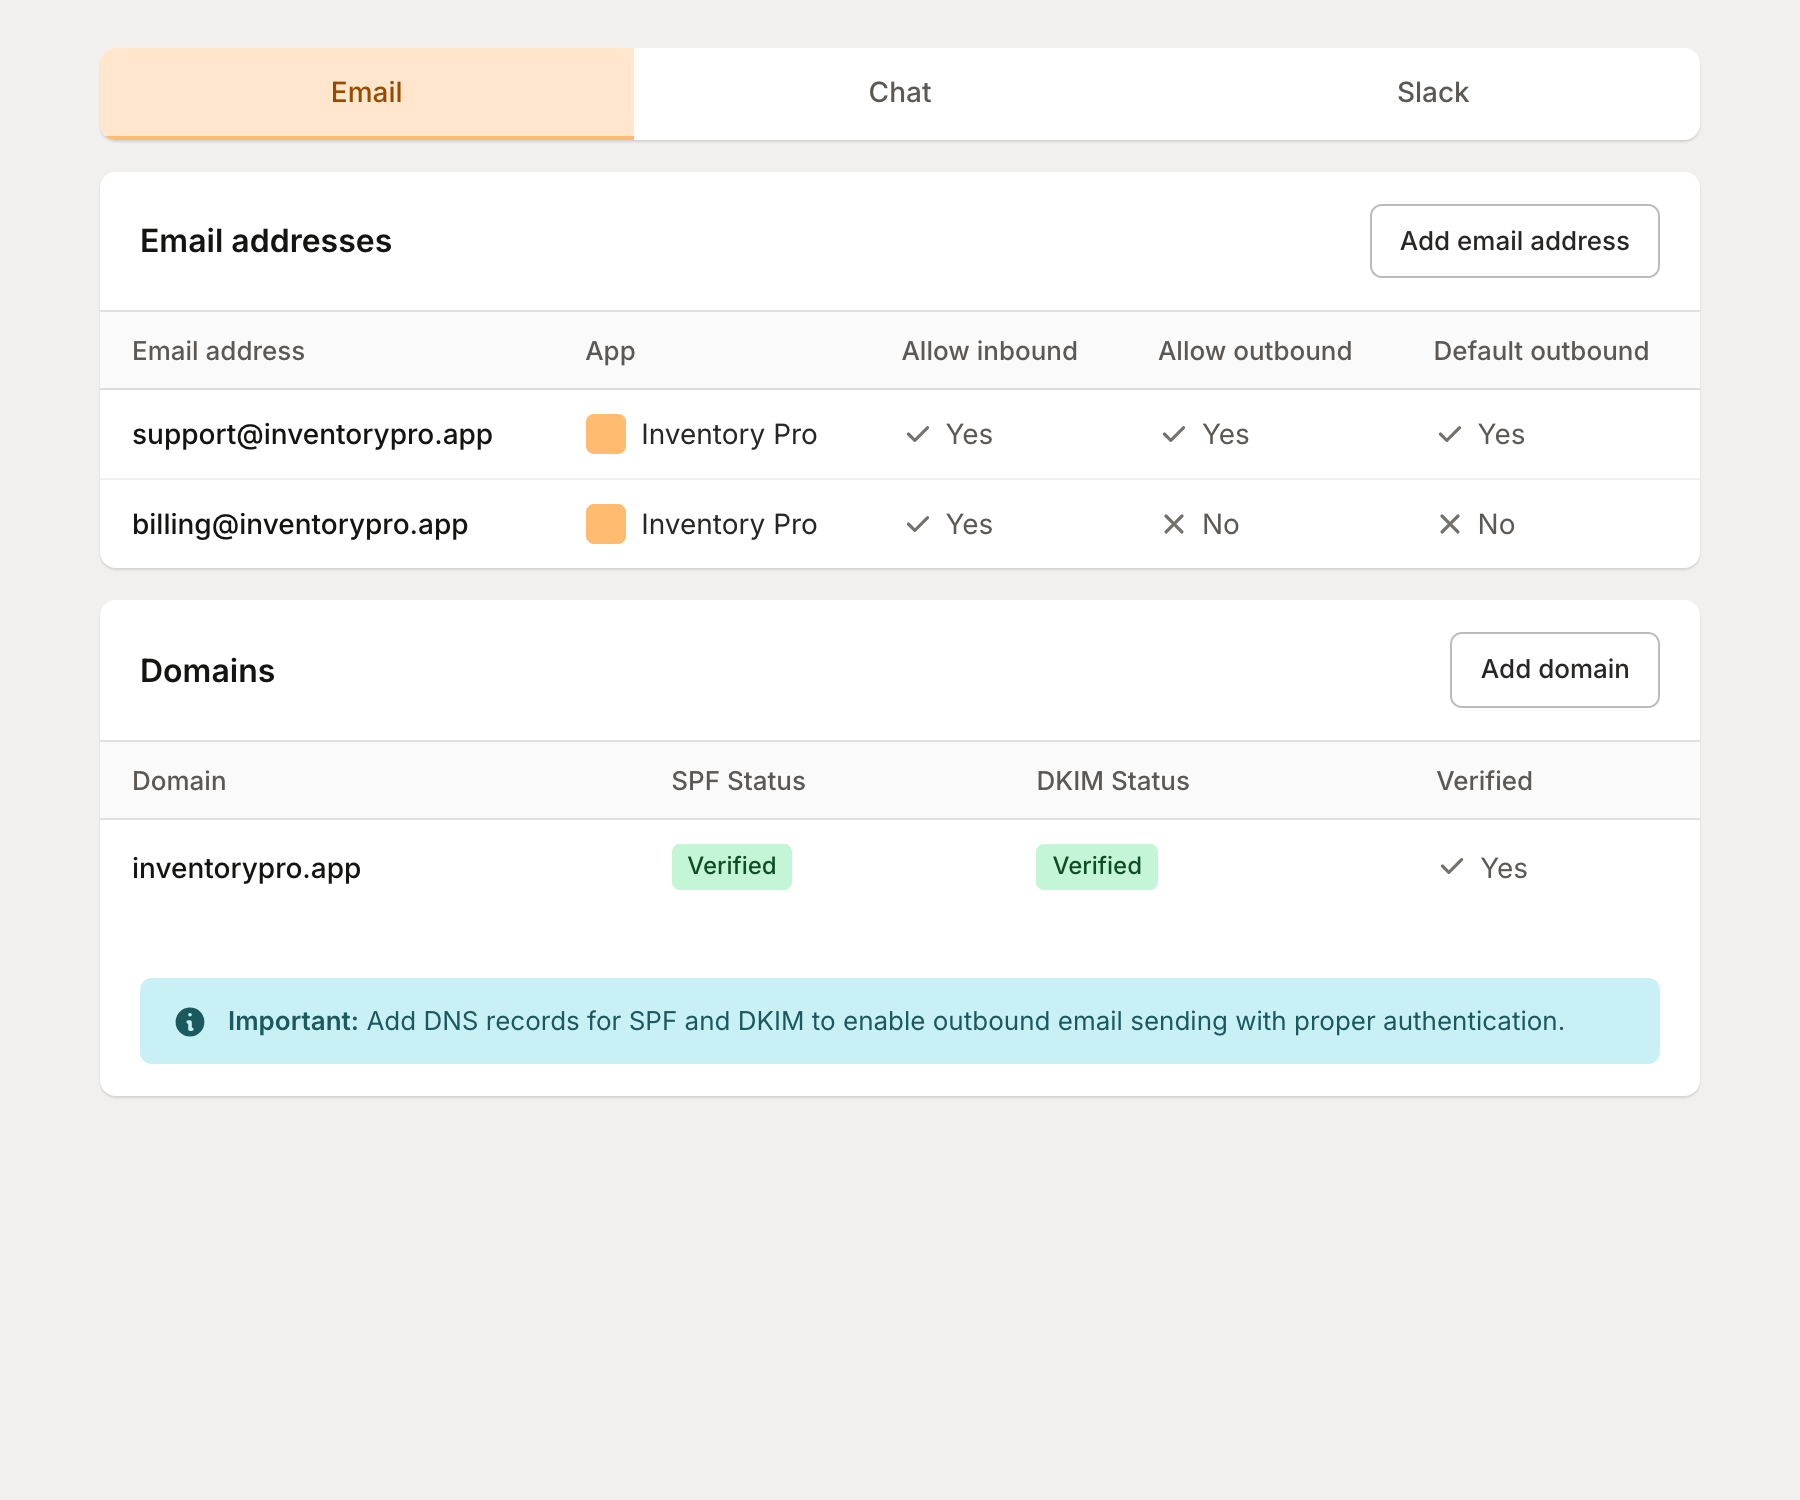
Email configuration options
Option | Description |
|---|---|
Allow inbound | Always enabled. Emails to this address create tickets. |
Allow outbound | Enable to send replies from this address. Requires verified domain. |
Default outbound | Use this as the default sender for all outbound emails. |
Associated app | Link emails to a specific app for better ticket routing and reporting. |
Custom reply-to | Set a different reply-to address if needed. |
Slack support
Slack integration lets your team receive support tickets directly from Slack channels. This is ideal for B2B apps where you already communicate with customers via shared Slack channels.
How Slack support works
Instead of monitoring Slack 24/7, you can configure Mantle to watch specific channels and create tickets based on emoji reactions:
Customer posts a message in a monitored Slack channel
A team member (or the customer) reacts with the trigger emoji (e.g., eyes emoji)
Mantle creates a ticket linked to that Slack message
Your team can respond from Mantle or directly in Slack
React with the resolved emoji (e.g., checkmark) to close the ticket
Setting up Slack support
Go to Help Desk > Settings > Channels
Select the Slack tab
Click Connect Slack workspace and authorize the Mantle app
Click Add channel to monitor a Slack channel
Adding a channel to monitor
In Slack, right-click the channel you want to monitor
Click View channel details
Scroll to the bottom and copy the Channel ID
Paste the ID in the Mantle "Add channel" modal
Configure the trigger emoji and resolved emoji
Invite the Mantle bot to the channel:
/invite @Mantle
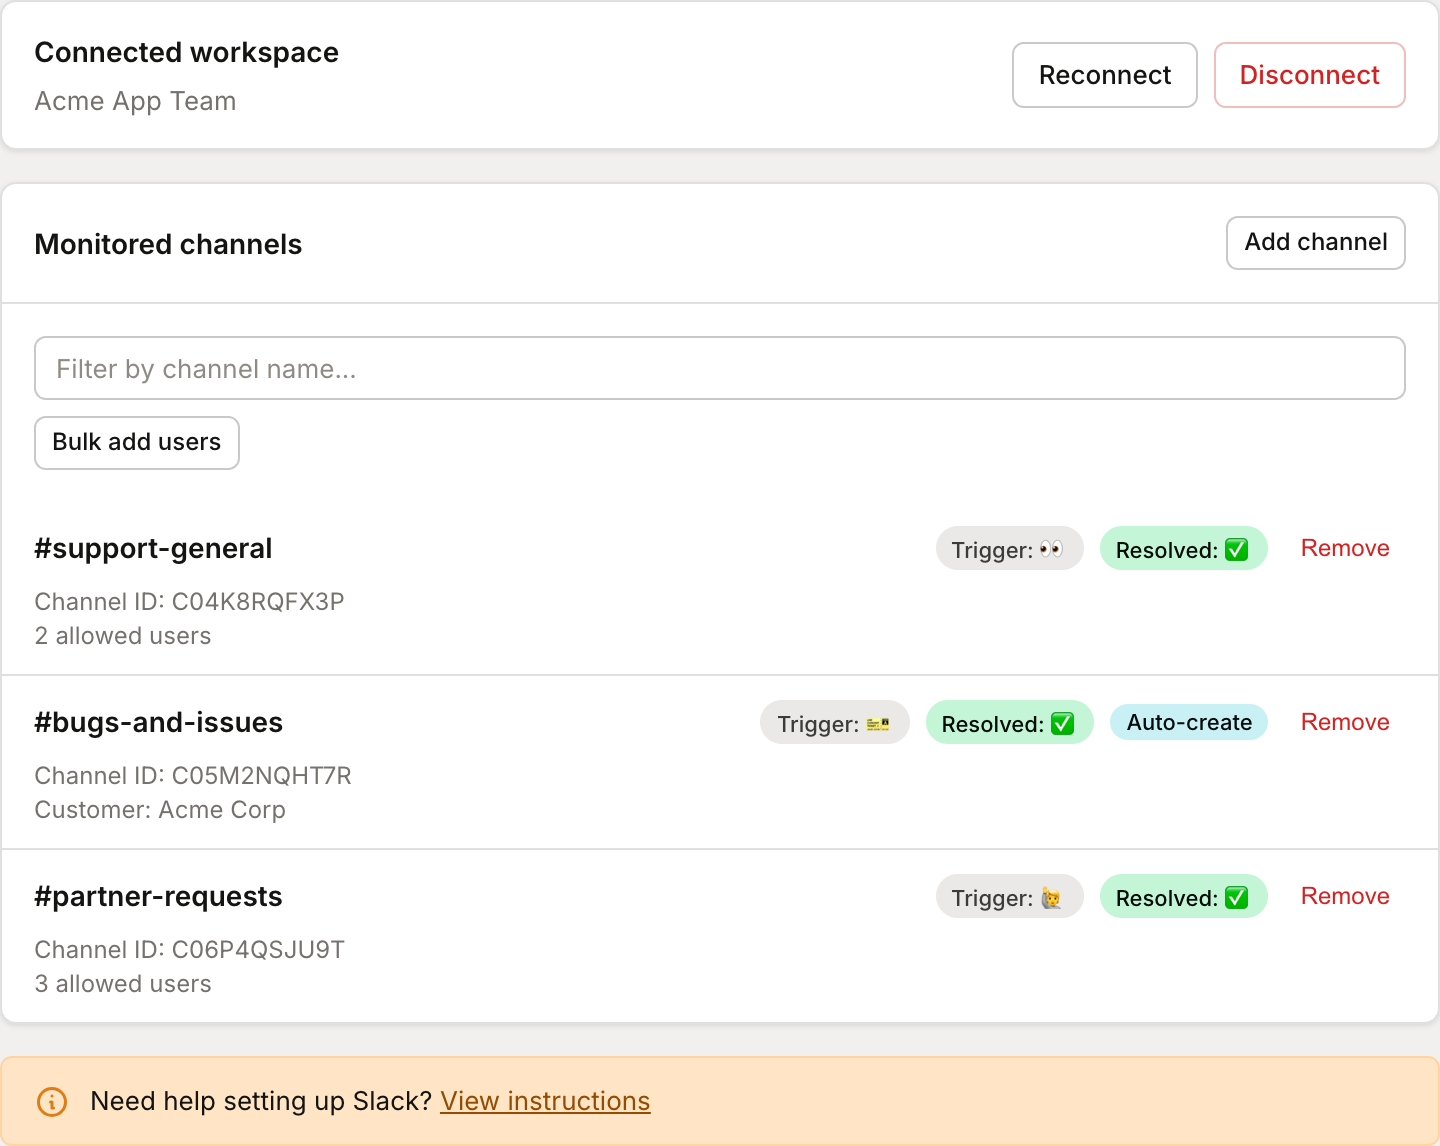
Slack configuration options
Option | Description |
|---|---|
Trigger emoji | React with this emoji to create a ticket (default: eyes emoji) |
Resolved emoji | React with this emoji to mark as resolved (default: checkmark) |
Auto-create threads | Create tickets for all messages without needing emoji reactions |
Customer | Link channel to a specific customer for dedicated support channels |
Allowed users | Restrict who can trigger ticket creation (default: workspace admins) |
Pro tip: Use dedicated Slack channels for your biggest customers and link them to specific customer records. This automatically associates all tickets with the right customer.
Chat support
The chat widget provides real-time messaging directly in your app or website. Customers can get help without leaving your product, and conversations can seamlessly continue via email if needed.
How chat support works
You embed the Mantle widget on your app or website
Customers click the chat icon to start a conversation
Messages appear in your Mantle inbox as tickets
Your team responds in real-time (or the AI agent can help)
If the customer leaves, the conversation can continue via email
Setting up chat support
Chat support is configured through the widget settings in Help Desk > Settings > Widget. You'll need to:
Create a widget and associate it with your app
Configure the chat channel settings (availability, authentication)
Embed the widget code in your app or website
See the Support Widget documentation for detailed setup instructions.
Chat configuration options
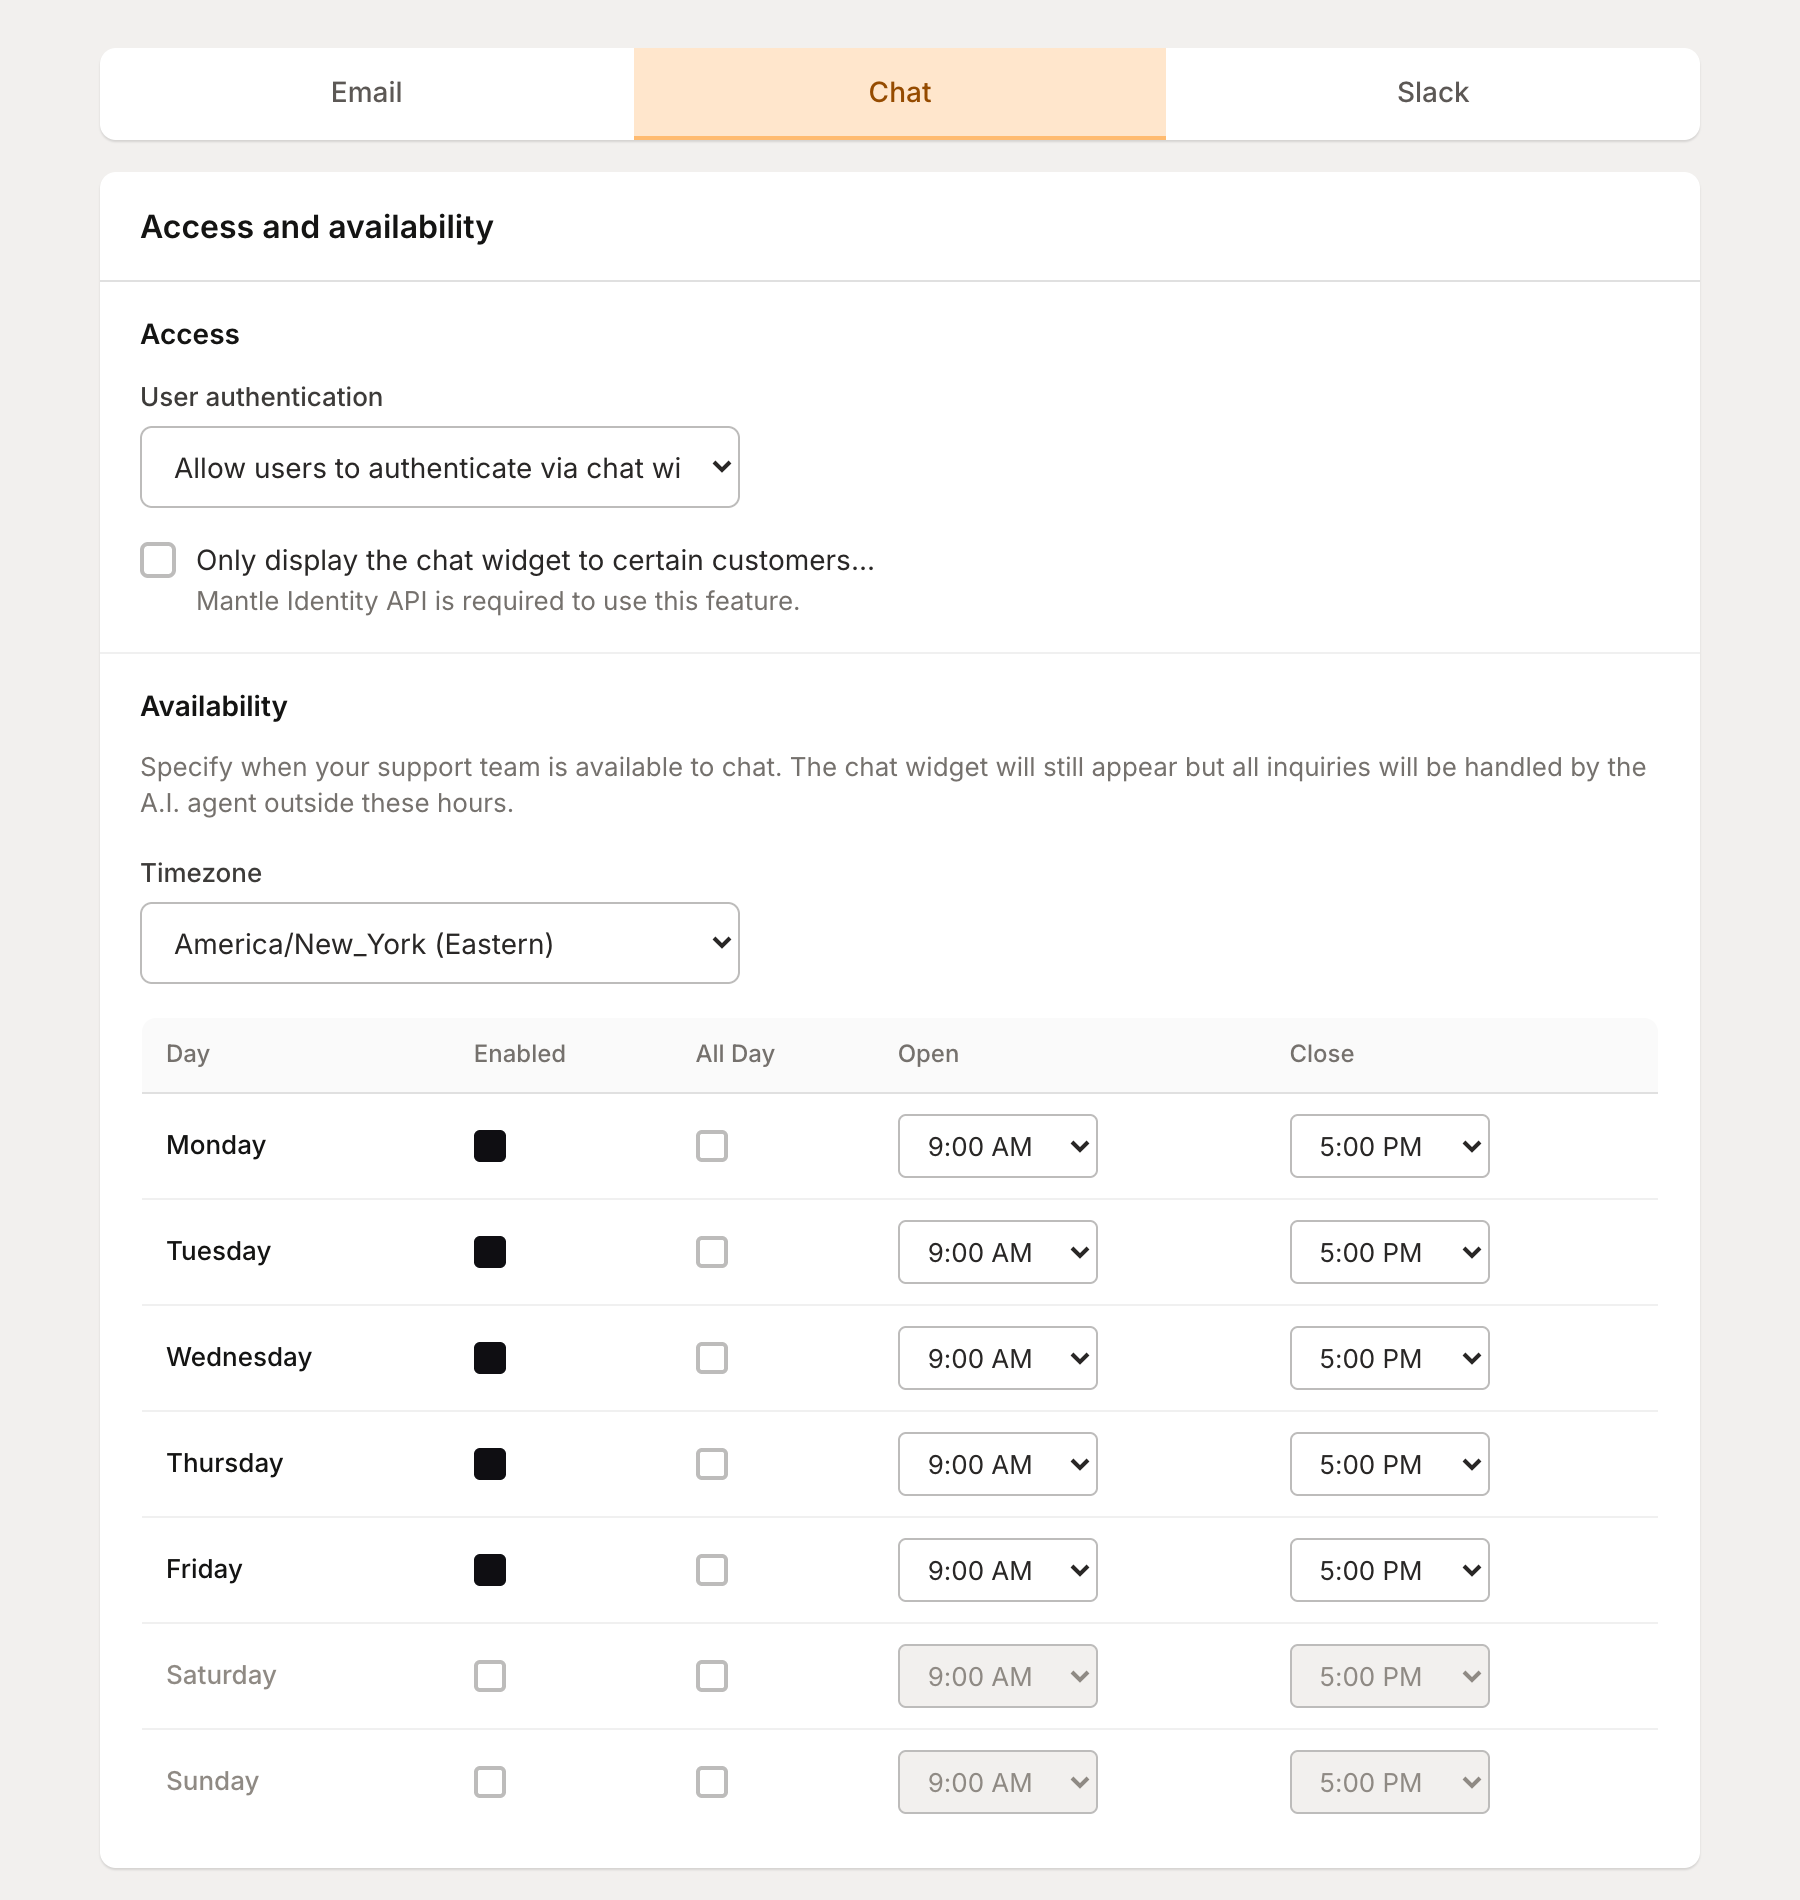
Option | Description |
|---|---|
User authentication | Allow, require, or disable authentication for chat users |
Availability schedule | Set business hours when live chat is available |
Email integration | Allow chat tickets to continue via email when offline |
Customer targeting | Only show widget to customers with specific tags |
Managing multiple channels
All channels feed into the same unified inbox. When viewing tickets, you can see which channel each ticket came from using the channel badge (Email, Slack, or Chat).
Channel-specific responses
When you respond to a ticket, the reply is automatically sent through the same channel the customer used:
Email tickets — Reply is sent as an email
Slack tickets — Reply is posted as a thread reply in Slack
Chat tickets — Reply appears in the chat widget (or email if customer is offline)
Enabling and disabling channels
Each channel can be enabled or disabled independently. When a channel is disabled:
No new tickets will be created from that channel
Existing tickets remain accessible
You can respond to existing tickets
To toggle a channel, go to its settings page and click Enable channel or Disable channel at the bottom.
Elements
Elements extend your helpdesk by connecting to external tools. Unlike channels that receive incoming messages, elements let you take actions from tickets—like creating issues in your project tracker or syncing ticket status with external systems.
GitHub
Connect your helpdesk to GitHub to create issues directly from support tickets. When a customer reports a bug or requests a feature, you can turn that ticket into a GitHub issue—or link it to an existing one. AI helps draft the issue details, and Mantle can even find similar issues to prevent duplicates.
Setting up GitHub
Go to Settings > Extensions > Marketplace
Find GitHub and click Add installation
You'll be redirected to GitHub to install the Mantle GitHub App
Choose whether to install for your personal account or an organization
Select which repositories Mantle can access (all or specific ones)
Click Install to complete setup
You can add multiple installations if you have repositories across different GitHub accounts or organizations.
Creating issues from tickets
From any ticket, click Create GitHub Issue to open the issue creation modal. The modal helps you:
Select a repository — Choose from your connected repositories
Generate with AI — Let AI suggest a title, description, and labels based on the ticket
Find similar issues — Mantle searches for existing issues that might be duplicates
Add labels — Tag the issue with labels from your repository
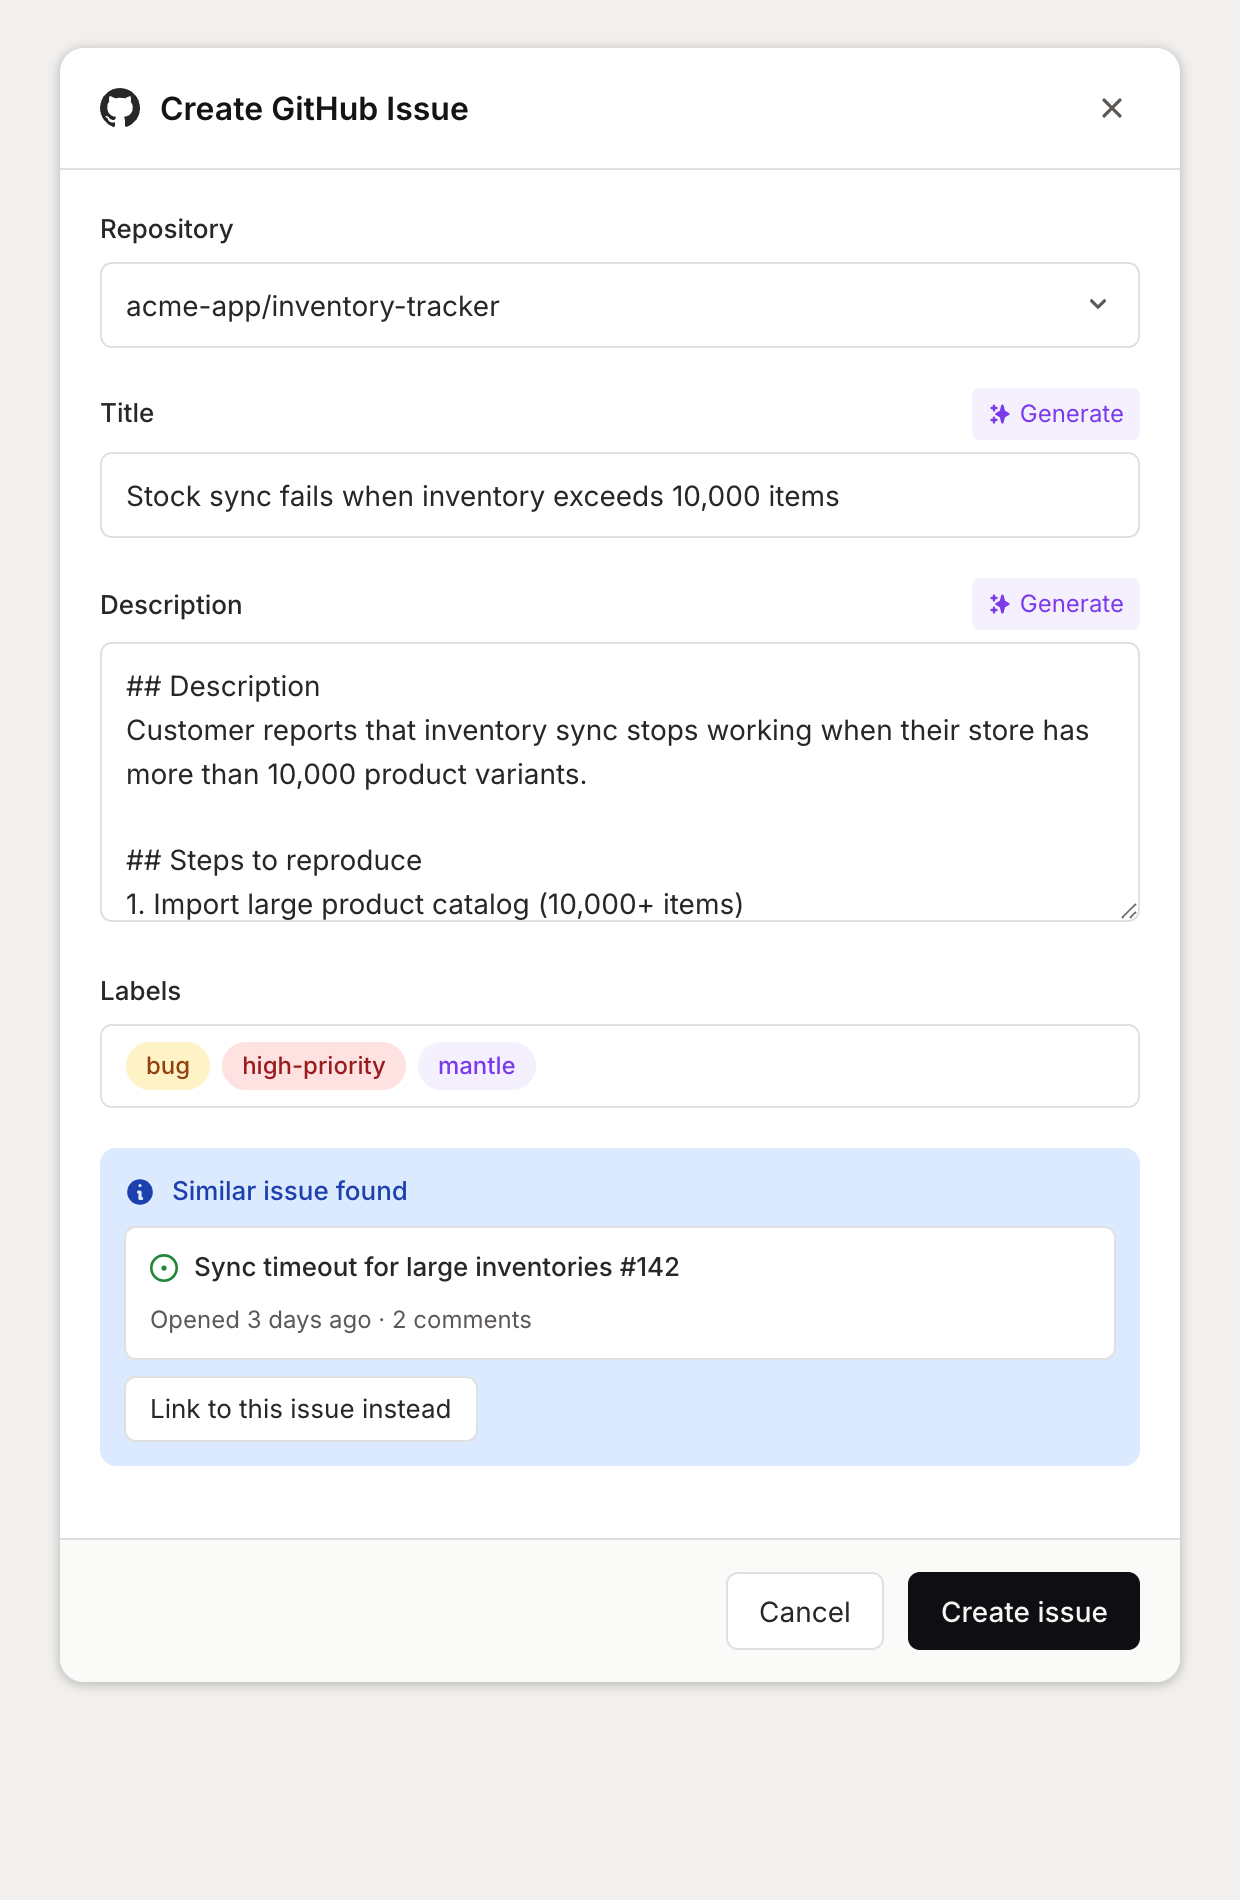
When you create the issue, Mantle adds a "Mantle Relations" section to the issue body. This links back to the original ticket so developers can see the full customer conversation.
Linking existing issues
Already have a GitHub issue for this problem? Instead of creating a duplicate, you can link the ticket to an existing issue:
Click Create GitHub Issue on the ticket
Paste the URL of an existing GitHub issue or pull request
Mantle updates the issue to include the ticket reference
If the issue was closed, Mantle will reopen it automatically.
Reopening tickets when issues close
When a GitHub issue is resolved, you probably want to follow up with the customer who reported it. Mantle can automatically reopen the linked ticket when a GitHub issue is closed.
To enable this:
Go to Settings > Extensions > Marketplace > GitHub
Click the installation you want to configure
Enable Reopen tickets when GitHub issues are closed
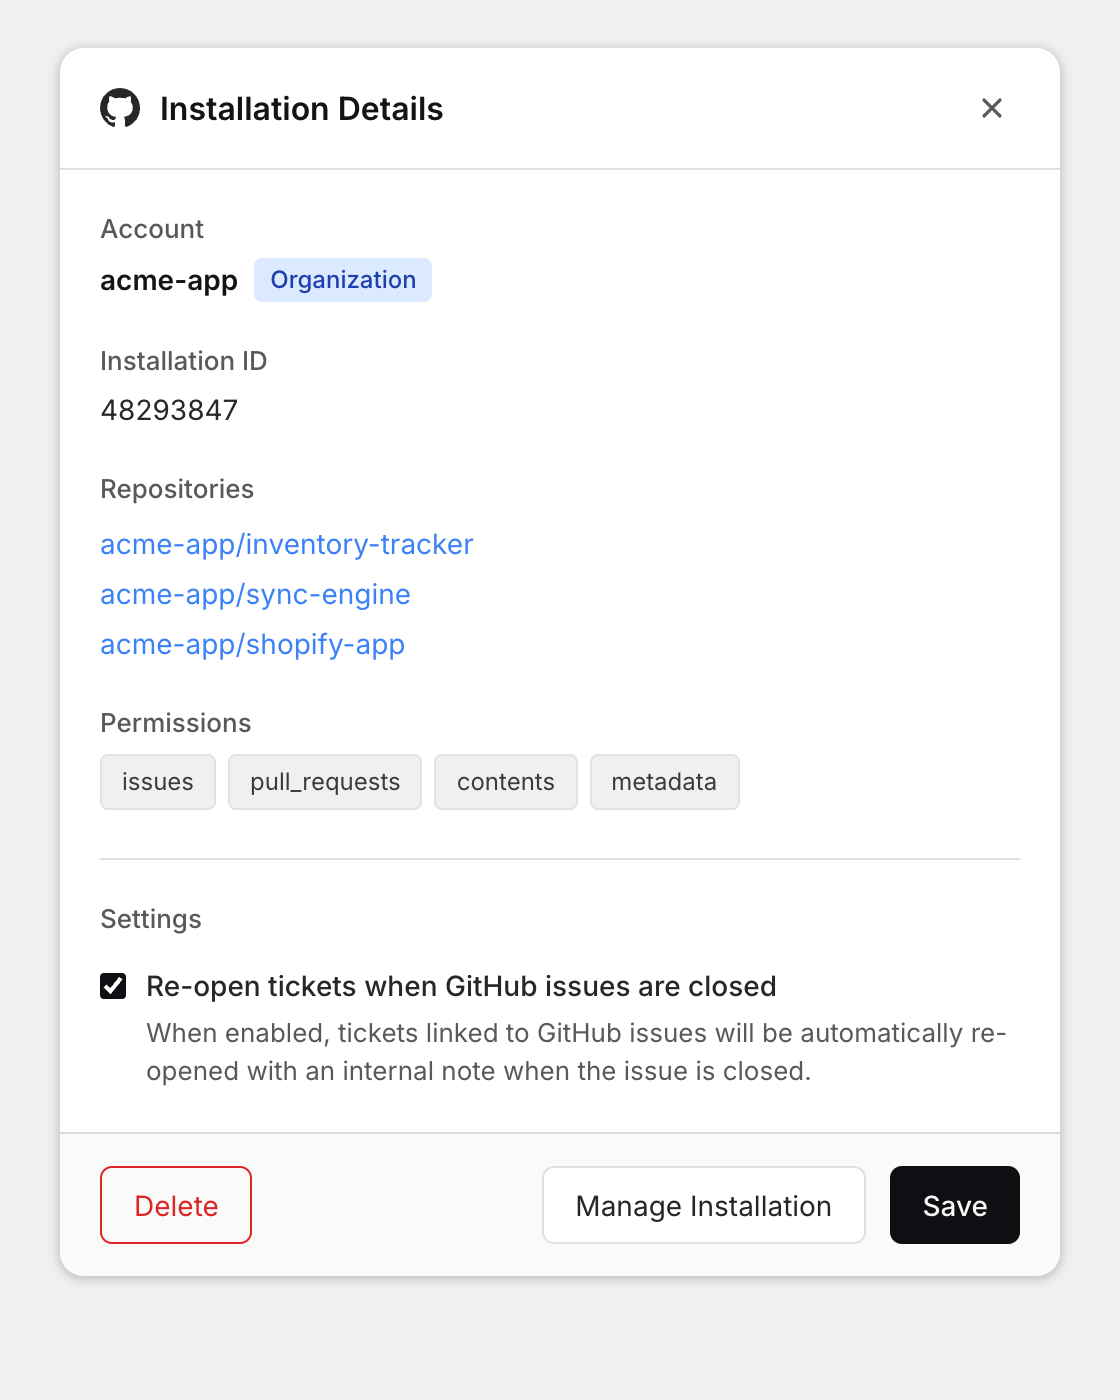
When enabled, closing a GitHub issue will:
Reopen the linked Mantle ticket
Add an internal note: "This issue has been resolved, please review the ticket and contact the customer if necessary"
Issue templates
Create templates to standardize how issues are created. Templates can include:
Default title format (using Liquid variables)
Description template with sections for reproduction steps, expected behavior, etc.
Assignment to specific repositories
Manage templates in Settings > Extensions > Marketplace > GitHub > Templates.
Go further
Getting started with Helpdesk — Overview of the helpdesk features
Support Widget — Detailed guide to embedding the chat widget
AI-Powered Support — Configure automated responses for your channels