Support Widget
Your customers shouldn't have to leave your app to get help. The support widget embeds your documentation, AI-powered answers, and live chat directly into your product—giving customers instant answers right where they need them.
What customers see
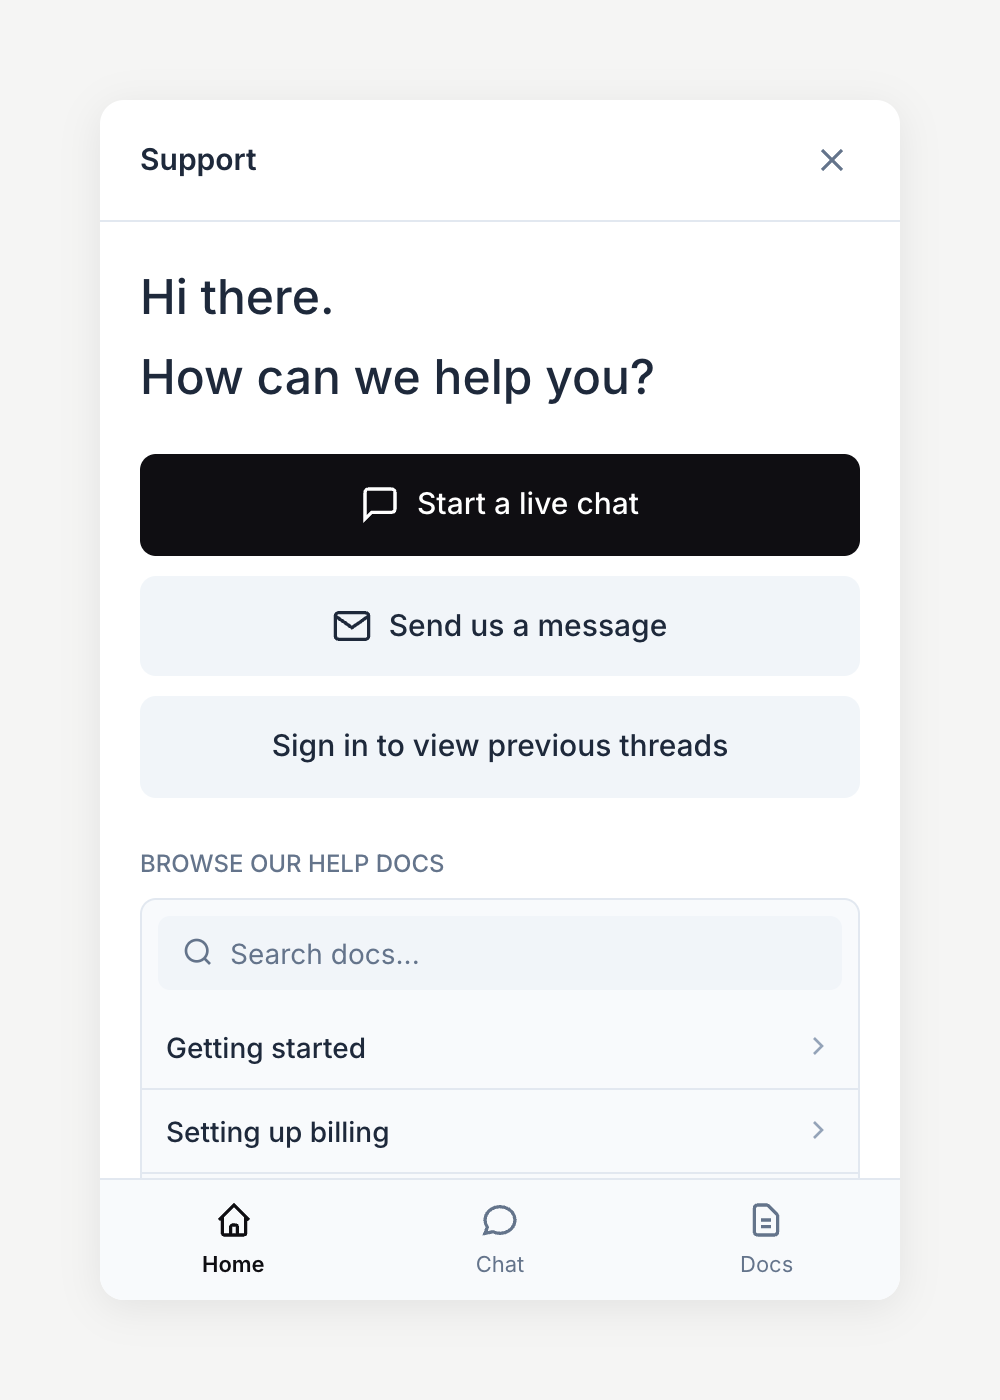
The widget appears as a floating button in the corner of your app. When customers click it, they see a home screen with quick actions and your help documentation.
Widget features
Feature | Description |
|---|---|
Documentation search | Customers search and browse your help articles instantly |
AI-powered answers | Natural language questions get answers synthesized from your docs |
Live chat | Real-time conversations with your support team when online |
Email fallback | Customers can submit requests when chat is unavailable |
Conversation history | Authenticated users see their previous conversations |
Live chat
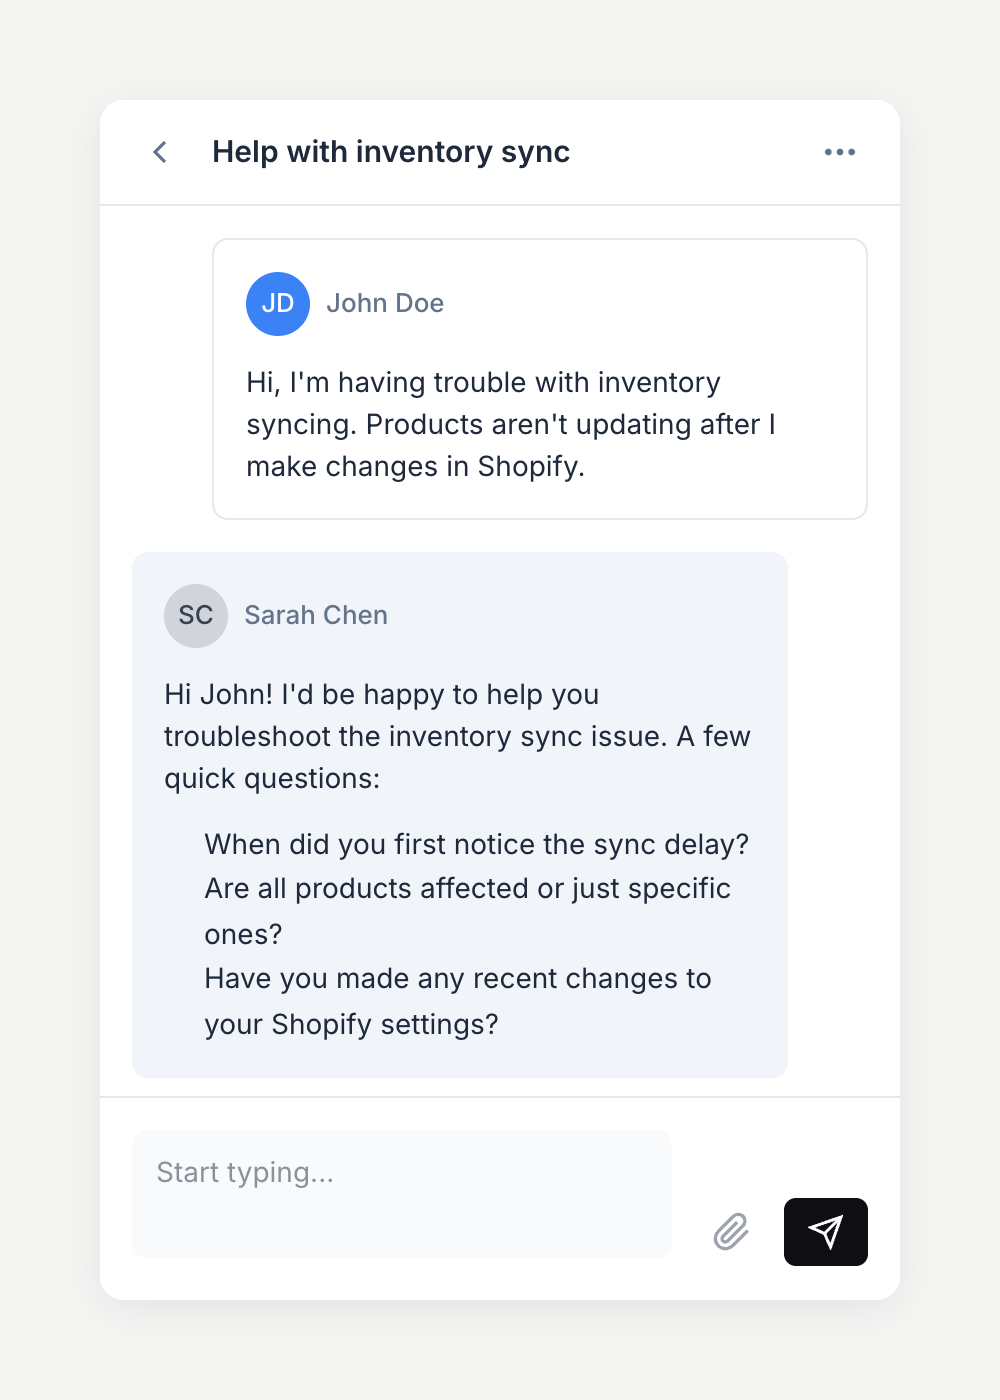
When chat is enabled and your team is online, customers can start real-time conversations. Messages appear in your helpdesk inbox as tickets, and your replies post back to the widget instantly.
Chat automatically adapts to your team's availability:
Online (within business hours) — Shows live chat option with real-time messaging
Offline (outside hours) — Falls back to email form so customers can still reach you
Creating a widget
To create your first support widget:
Go to Helpdesk in the main navigation
Click Settings in the sidebar
Scroll to the Widgets section
Click Create widget
Select which app this widget is for
Configure your support channels and documentation
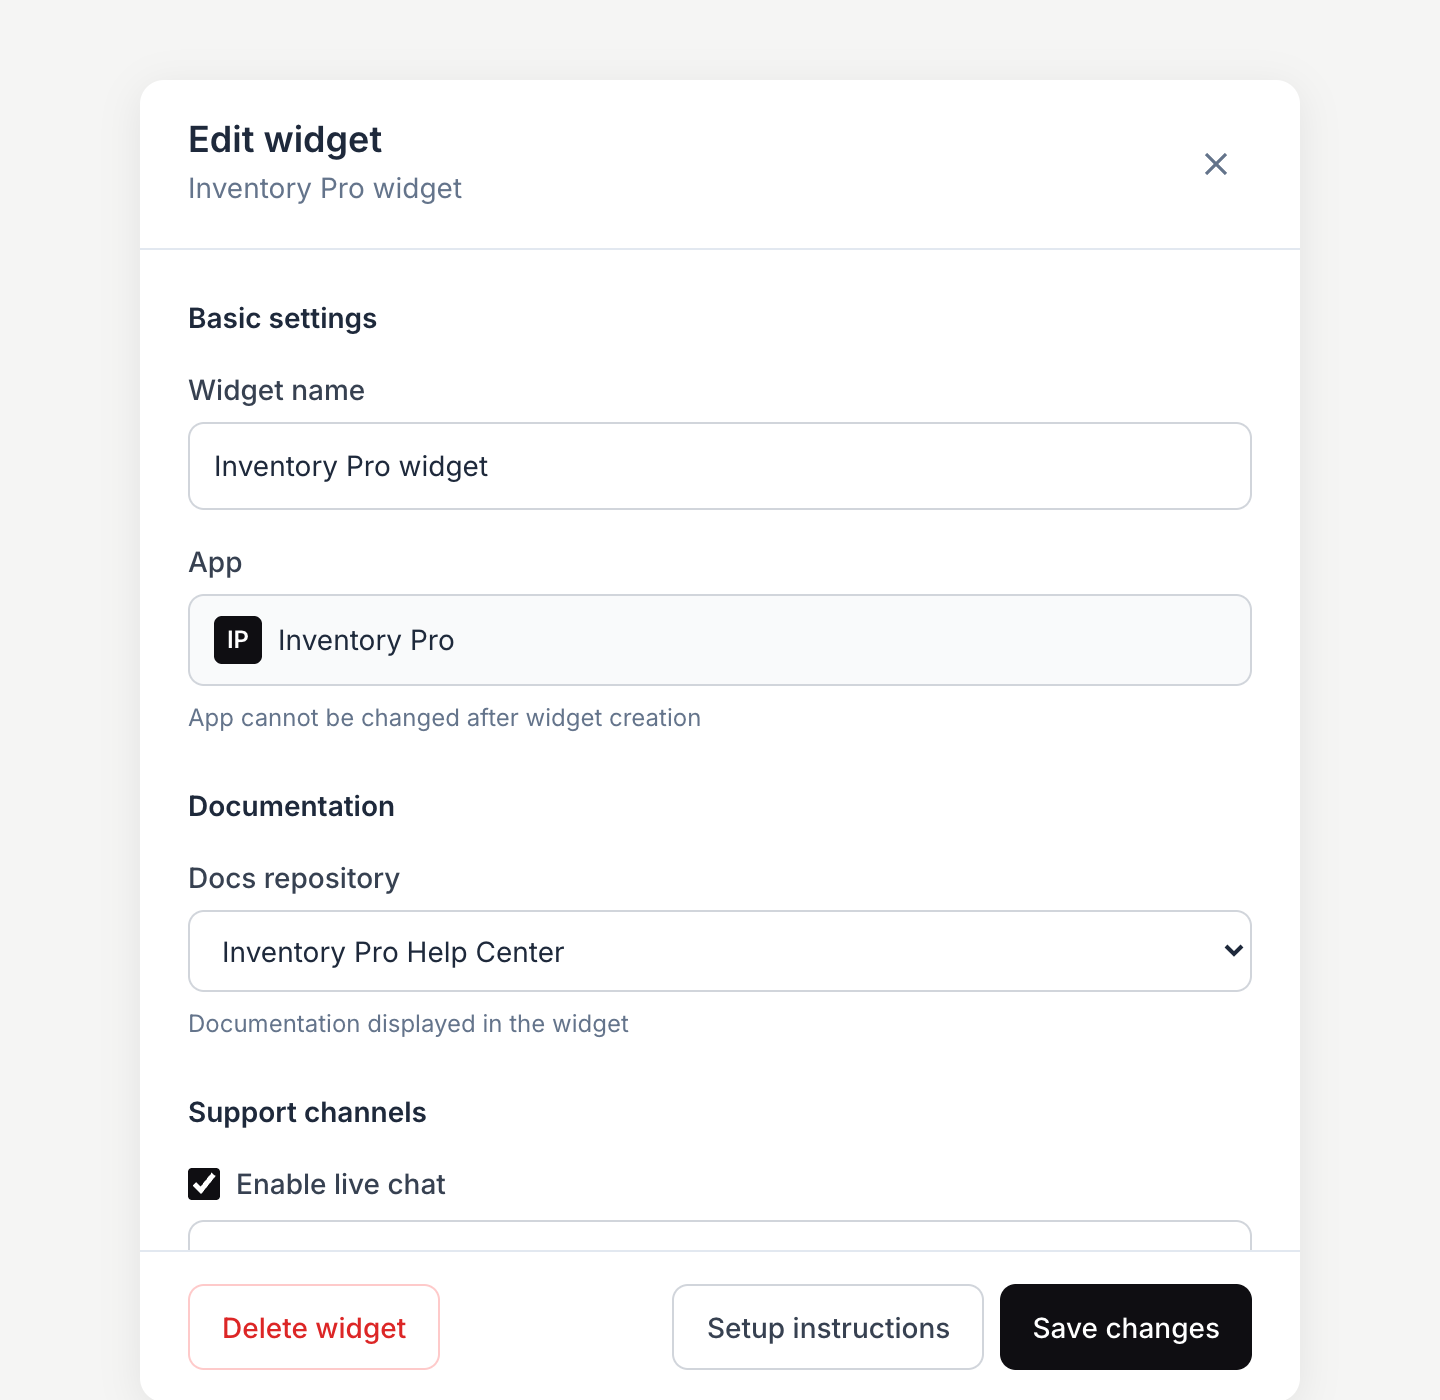
Configuration options
Setting | Description |
|---|---|
Widget name | Internal identifier to help you recognize this widget (e.g., "Production Widget") |
Supported app | Which app this widget supports—determines customer identification and reporting |
Docs repository | Which documentation to display in the widget (auto-selected if you have only one) |
Enable live chat | Allow customers to start real-time conversations with your team |
Enable email support | Allow customers to send messages when chat is unavailable or disabled |
Authentication options
Authentication lets customers sign in for a personalized experience with conversation history preserved across sessions.
Method | Description |
|---|---|
Require sign-in | When enabled, users must sign in or provide contact info before starting a chat |
Google sign-in | Allow customers to sign in with their Google account |
Email OTP | Allow customers to sign in with a one-time password sent to their email (always enabled when auth is on) |
Installing the widget
After creating your widget, click Setup instructions to get the installation code. Add the script tag to your app's HTML.
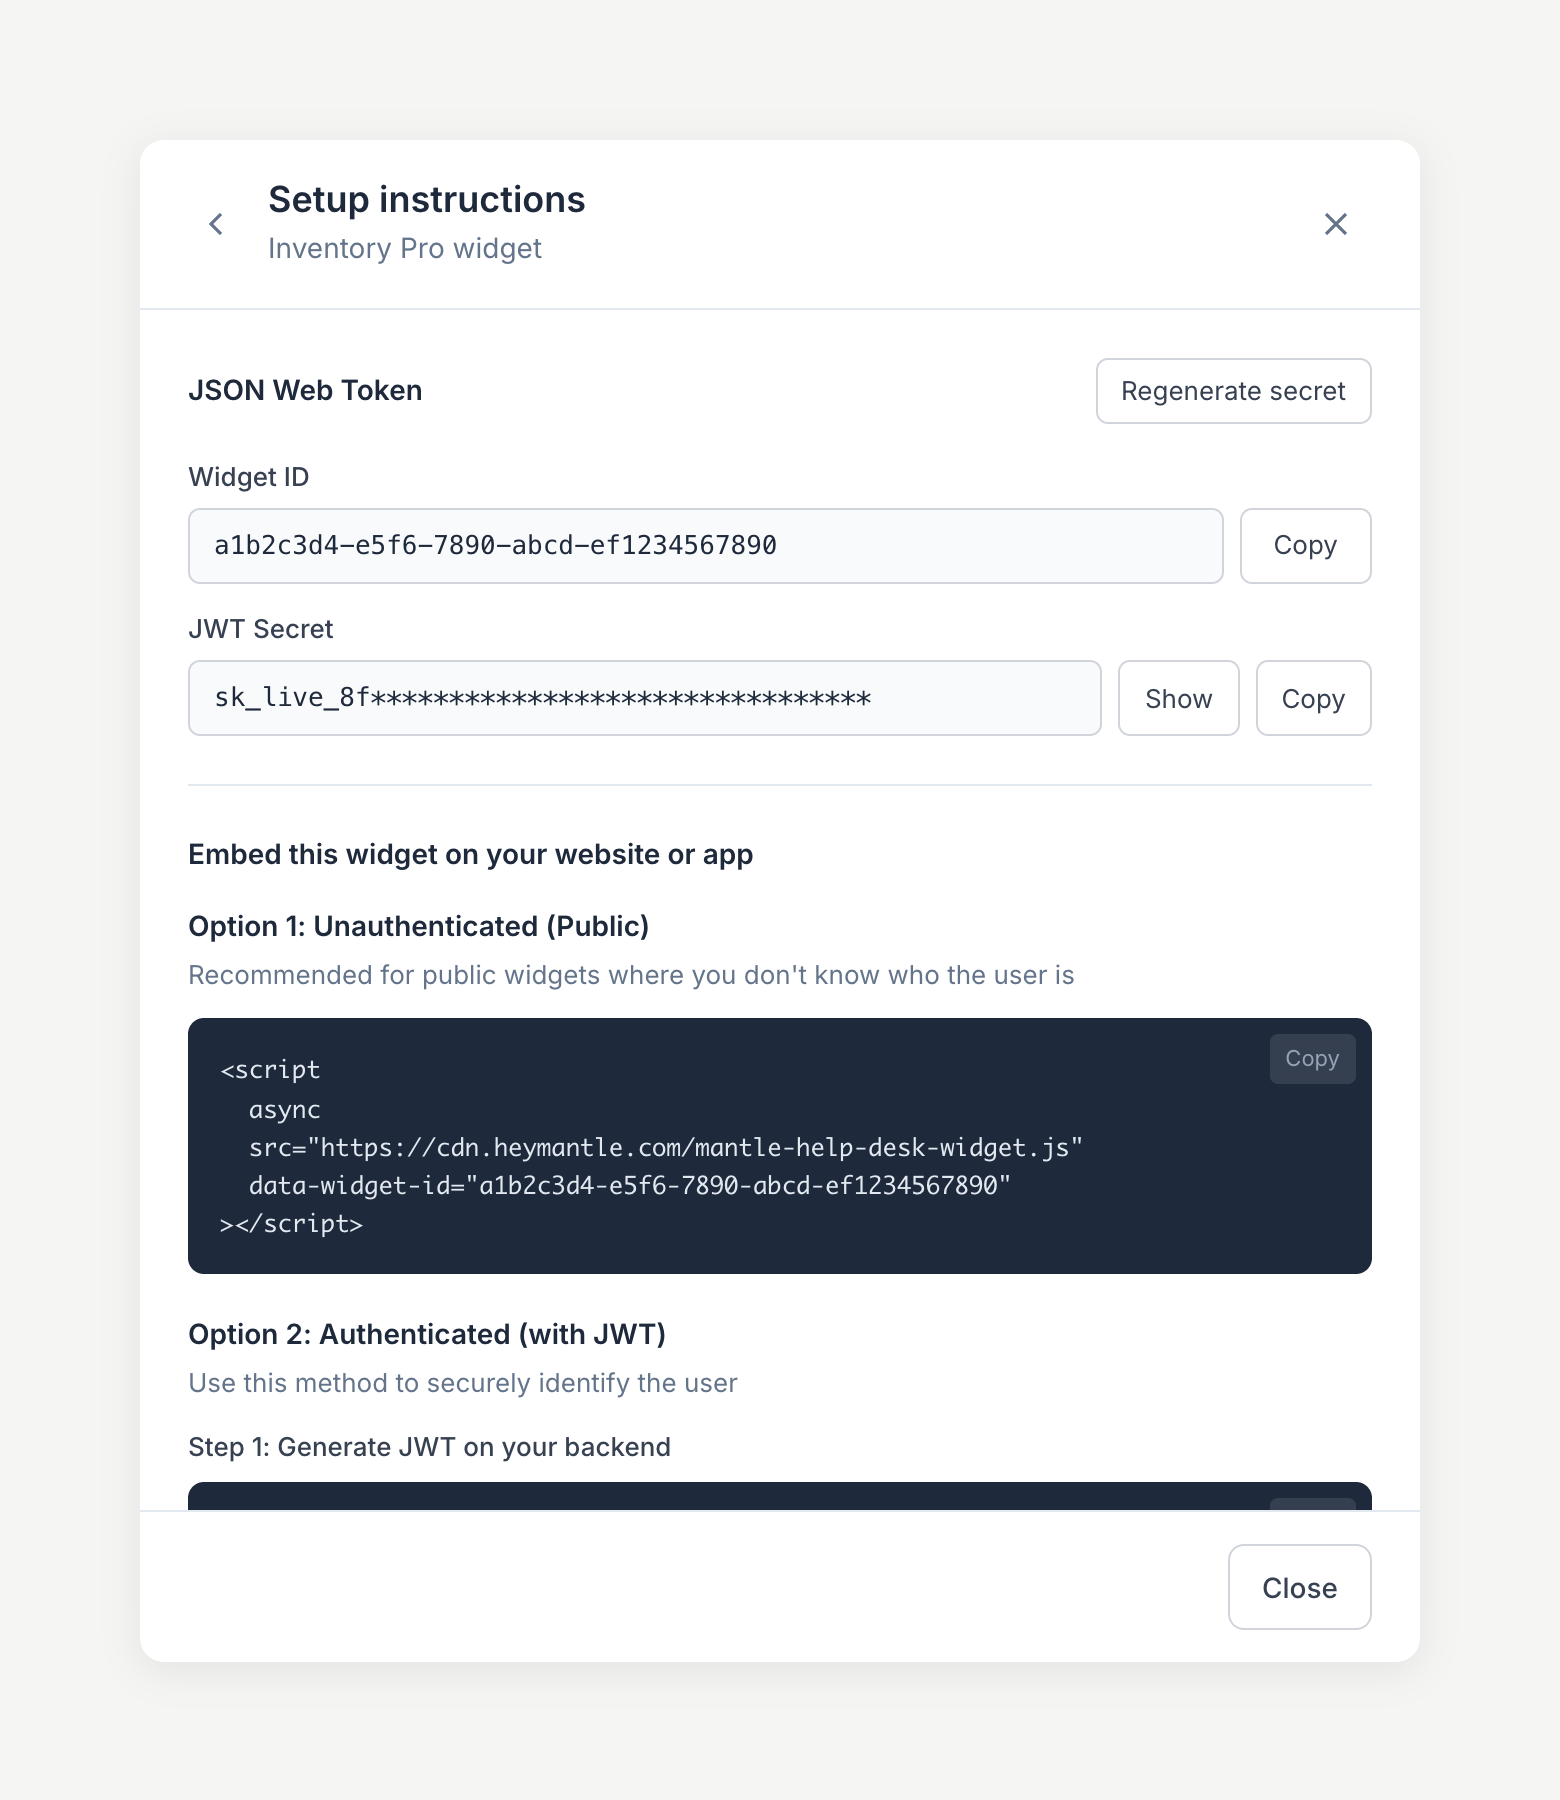
Basic installation (unauthenticated)
For a simple setup where you don't need to identify users:
<script
  async
  src="https://cdn.heymantle.com/mantle-help-desk-widget.js"
  data-widget-id="your-widget-id"
></script>
This is ideal for public websites where you don't know who the user is. Customers can still use documentation, start chats, and send messages—they'll just need to provide their contact information.
Automatic authentication with the Mantle Pixel (Shopify apps)
If you already have the Mantle Pixel script on the same page with contact capture configured, the widget will automatically authenticate your Shopify users—no additional setup needed.
The script detects the widget on the page and securely logs the user in via JWT. The customer's name, email, and customer ID are included automatically, so any tickets or chats they create are fully authenticated and linked to their customer record and contact in Mantle.
Remember to replace YOUR_APP_TOKEN with the app token provided on the Mantle Pixel configuration page.
<!-- Both scripts on the same page — authentication is automatic -->
<script
  async
  src="https://cdn.heymantle.com/mantle_apptrack.js?appToken=<YOUR_APP_TOKEN>"
></script>

<script
  async
  src="https://cdn.heymantle.com/mantle-help-desk-widget.js"
  data-widget-id="your-widget-id"
></script>With JWT authentication (manual)
If you're not using the Mantle Pixel, or need more control over authentication, you can generate a JWT token on your server and pass it to the widget. This automatically identifies customers without requiring them to sign in.
Step 1: Generate a JWT on your backend using your widget's secret:
const jwt = require('jsonwebtoken');

const token = jwt.sign(
  {
    widgetId: 'your-widget-id',
    email: '[email protected]',
    name: 'Customer Name',              // optional
    myshopifyDomain: 'store.myshopify.com',  // optional, for Shopify apps
    exp: Math.floor(Date.now() / 1000) + 3600  // 1 hour expiry
  },
  process.env.WIDGET_JWT_SECRET
);
Step 2: Include the token in the script tag or call the JS API:
// In the script tag at page load
<script
  async
  src="https://cdn.heymantle.com/mantle-help-desk-widget.js"
  data-widget-id="your-widget-id"
  data-jwt="your-generated-jwt-token"
></script>

// Or call the JS API anytime:

window.MantleHelpDeskWidget.setJwt(jwt);
Script attributes
Attribute | Required | Description |
|---|---|---|
| Yes | Your widget's unique identifier (from setup instructions) |
| No | JWT token for pre-authenticating users |
| No |
|
| No |
|
| No | Custom widget title (default: "Chat with us") |
| No | Set to |
| No | Set to |
| No | Set to |
JWT authentication details
JWT (JSON Web Token) authentication lets you securely identify customers from your backend. When you pass a valid JWT, the customer is automatically signed in with their information pre-filled.
JWT payload fields
Field | Required | Description |
|---|---|---|
| Yes | Must match your widget's ID |
| Yes | Customer's email address—used to identify and link conversations |
| No | Customer's display name |
| No | For Shopify apps, the customer's store domain for context |
| Yes | Token expiration as Unix timestamp |
Security tip: Always generate JWT tokens on your server, never in client-side code. Keep your JWT secret secure and regenerate it immediately if compromised.
Regenerating your JWT secret
If you need to regenerate your JWT secret (for example, if it was accidentally exposed):
Open your widget's setup instructions
Click Regenerate secret
Update your backend code with the new secret
JavaScript API reference
Control the widget programmatically from your application code. This is useful for opening the widget from custom help buttons, responding to user actions, or integrating with your app's UI.
init(options)
Initializes the widget with the provided configuration. Must be called before using other methods (unless using auto-initialization via data attributes).
Parameter | Type | Required | Description |
|---|---|---|---|
| string | Yes | Your widget ID from Mantle settings |
| string | No | JWT token for authenticated users |
| string | No | Launcher button theme: |
| string | No | Widget position: |
| string | No | API base URL (auto-detected for localhost vs production) |
| boolean | No | Enable debug logging to console |
| string | No | Widget header title (default: "Chat with us") |
window.MantleHelpDeskWidget.init({
  widgetId: 'your-widget-id',
  theme: 'light',
  position: 'bottom-left',
  widgetTitle: 'Need help?',
  showDocs: true,
  showLogin: true,
  debug: true
});
If the widget is already initialized, calling init() again will destroy the existing instance and create a new one.
show()
Opens and displays the widget.
// Show widget when user clicks a custom button
document.getElementById('help-button').addEventListener('click', () => {
  window.MantleHelpDeskWidget.show();
});
hide()
Closes and hides the widget.
window.MantleHelpDeskWidget.hide();toggle()
Toggles the widget visibility (opens if closed, closes if open).
// Toggle widget with keyboard shortcut
document.addEventListener('keydown', (e) => {
  if (e.ctrlKey && e.key === 'h') {
    e.preventDefault();
    window.MantleHelpDeskWidget.toggle();
  }
});
openDocsPage({ handle })
Opens a specific documentation page inside the widget.
Parameter | Type | Description |
|---|---|---|
| string | The page's unique handle/slug (e.g., "getting-started") |
window.MantleHelpDeskWidget.openDocsPage({ handle: 'getting-started' });getState()
Returns the current widget state object.
const state = window.MantleHelpDeskWidget.getState();
console.log('Visible:', state.isVisible);
console.log('Unread messages:', state.unreadCount);
Available state fields:
Field | Description |
|---|---|
| Whether the widget is currently visible |
| Whether the widget iframe is ready for communication |
| Number of unread messages |
setTheme(theme)
Updates the launcher button theme dynamically. Accepts light or dark.
// Match widget theme to system preference
const prefersDark = window.matchMedia('(prefers-color-scheme: dark)').matches;
window.MantleHelpDeskWidget.setTheme(prefersDark ? 'dark' : 'light');

// Listen for theme changes
window.matchMedia('(prefers-color-scheme: dark)').addEventListener('change', (e) => {
  window.MantleHelpDeskWidget.setTheme(e.matches ? 'dark' : 'light');
});
setPosition(position)
Updates the widget position dynamically. Accepts bottom-right, bottom-left, top-right, or top-left.
window.MantleHelpDeskWidget.setPosition('bottom-left');setJwt(token)
Updates the JWT token dynamically. Useful for single-page apps where the user logs in after the widget loads.
// After user authenticates in your app
async function onUserLogin(user) {
  const jwt = await fetchJwtFromServer(user.id);
  window.MantleHelpDeskWidget.setJwt(jwt);
}
on(eventName, callback)
Subscribes a callback to a widget event. See Events below for the full list.
window.MantleHelpDeskWidget.on('visibilityChange', ({ isVisible }) => {
  console.log('Widget is now', isVisible ? 'open' : 'closed');
});
off(eventName, callback)
Unsubscribes a previously registered callback. Pass the same function reference you passed to on().
const handler = ({ unreadCount }) => updateBadge(unreadCount);

window.MantleHelpDeskWidget.on('unreadCountChange', handler);

// Later, when you no longer need the listener:
window.MantleHelpDeskWidget.off('unreadCountChange', handler);
destroy()
Completely removes the widget from the page, cleans up event listeners, and resets all state. You must call init() again to reinitialize after destroying.
window.MantleHelpDeskWidget.destroy();Events
Subscribe to widget events with MantleHelpDeskWidget.on(eventName, callback). Use MantleHelpDeskWidget.off(eventName, callback) to unsubscribe.
unreadCountChange
Fired when the number of unread conversations changes. Only fires when the count actually changes, not on every poll cycle.
Callback argument: { unreadCount: number }
window.MantleHelpDeskWidget.on('unreadCountChange', ({ unreadCount }) => {
  document.getElementById('my-badge').textContent = unreadCount || '';
});userLogout
Fired when a user logs out of the widget.
Callback argument: {} (empty object)
window.MantleHelpDeskWidget.on('userLogout', () => {
  console.log('User logged out');
  // Clear user session, track analytics, etc.
  clearUserSession();
});
visibilityChange
Fired when the widget is shown or hidden. Only fires when visibility actually changes. Redundant show() / hide() calls do not re-fire.
Callback argument: { isVisible: boolean, trigger: 'user' | 'api' }
isVisible: the new visibility state.trigger:'user'if the user clicked the launcher button or the close button inside the widget;'api'if the change came fromshow(),hide(),toggle(),openChat(),openDocsPage(), or initial state restoration.
// Mirror widget state in a custom launcher button
window.MantleHelpDeskWidget.on('visibilityChange', ({ isVisible, trigger }) => {
  document.getElementById('my-launcher').classList.toggle('is-active', isVisible);

  // Only track explicit user interactions in analytics
  if (trigger === 'user') {
    analytics.track(isVisible ? 'widget_opened' : 'widget_closed');
  }
});
navigate
Fired when a link inside the widget requests navigation in the host page (for example, a documentation link or marketing CTA).
By default, the widget handles navigation itself by setting window.location.href (for same-site links) or calling window.open(url, '_blank'). If you register a navigate listener, the widget defers navigation entirely to your handler. It will not touch window.location or open new tabs. This lets SPAs route through their own router instead of triggering full page reloads.
Callback argument: { url: string, sameSite: boolean }
url: the link URL the iframe wants to open.sameSite:trueif the link is intended for in-app navigation,falseif it should open in a new tab.
import { useRouter } from 'next/navigation';

const router = useRouter();

window.MantleHelpDeskWidget.on('navigate', ({ url, sameSite }) => {
  if (sameSite) {
    router.push(url);
  } else {
    window.open(url, '_blank');
  }
});
Note: Because registering a listener disables the widget's default navigation, your handler must do something with the URL or links inside the widget will silently no-op.
State management
The widget automatically persists state across page reloads using localStorage:
Open/closed state — restored on page load
Expanded/collapsed size — restored on page load
Widget session ID — for anonymous sessions
State is keyed by widgetId, so multiple widgets on the same domain maintain separate state.
Widget sizing
Desktop: 400px wide (collapsed), 700px wide (expanded), 600px height
Mobile (< 440px): Full screen, edge-to-edge
Framework examples
React
import { useEffect, useRef } from 'react';

function App() {
  const widgetInitialized = useRef(false);

  useEffect(() => {
    const script = document.createElement('script');
    script.src = 'https://cdn.heymantle.com/mantle-help-desk-widget.js';
    script.async = true;

    script.onload = () => {
      window.MantleHelpDeskWidget.init({
        widgetId: 'your-widget-id',
        theme: 'dark',
        position: 'bottom-right'
      });
      widgetInitialized.current = true;
    };

    document.head.appendChild(script);

    return () => {
      if (widgetInitialized.current) {
        window.MantleHelpDeskWidget.destroy();
      }
    };
  }, []);

  return (
    <button onClick={() => window.MantleHelpDeskWidget.show()}>
      Open Help
    </button>
  );
}
Vue.js
<template>
  <button @click="showWidget">Open Help</button>
</template>

<script>
export default {
  mounted() {
    const script = document.createElement('script');
    script.src = 'https://cdn.heymantle.com/mantle-help-desk-widget.js';
    script.async = true;

    script.onload = () => {
      window.MantleHelpDeskWidget.init({
        widgetId: 'your-widget-id',
        theme: 'dark'
      });
    };

    document.head.appendChild(script);
  },
  beforeUnmount() {
    if (window.MantleHelpDeskWidget) {
      window.MantleHelpDeskWidget.destroy();
    }
  },
  methods: {
    showWidget() {
      window.MantleHelpDeskWidget?.show();
    }
  }
};
</script>
Best practices
Use JWT authentication — Pre-authenticated customers get the best experience with zero friction and full conversation history
Always enable documentation — Even without chat, docs help customers self-serve and reduce support volume
Configure email fallback — Always give customers a way to reach you when chat is offline
Keep tokens short-lived — Use 1-hour expiration for JWTs and refresh them as needed
Test the mobile experience — The widget adapts to mobile screens, but verify it works well with your app's UI
Match your brand — Use the theme option that best fits your app's design
Troubleshooting
Widget doesn't appear
Check that the script tag is properly included before
</body>Verify the
data-widget-idmatches your widget's ID exactlyCheck the browser console for errors (enable
data-debug="true")Ensure the widget is enabled in your Mantle settings
JWT authentication not working
Verify the JWT is signed with the correct secret
Check that
widgetIdin the JWT payload matchesdata-widget-idEnsure the token hasn't expired (check the
expfield)Confirm you're using the correct algorithm (HS256)
Chat shows as offline
Check that the chat channel is enabled in widget settings
Verify your team's availability hours in helpdesk settings
Ensure at least one agent is set to "available" during business hours
State not persisting
Check that
localStorageis enabled in the browserVerify no browser extensions are blocking
localStorageEnsure same domain/origin (
localStorageis origin-specific)
Methods not available
If window.MantleHelpDeskWidget is undefined:
Ensure the script has loaded (check the Network tab in dev tools)
Wait for the script to load using a
script.onloadcallbackCheck for JavaScript errors preventing script execution
Browser support
The widget supports all modern browsers: Chrome, Firefox, Safari, and Edge (latest versions). Requires JavaScript enabled, localStorage support, and the postMessage API.