Configuring your agents
Mantle comes with a set of pre-built system agents designed for common tasks—support, content writing, customer insights, and more. These agents are already configured with sensible defaults, so you can start using them right away. This guide shows you how to configure them for your specific needs.
System agents
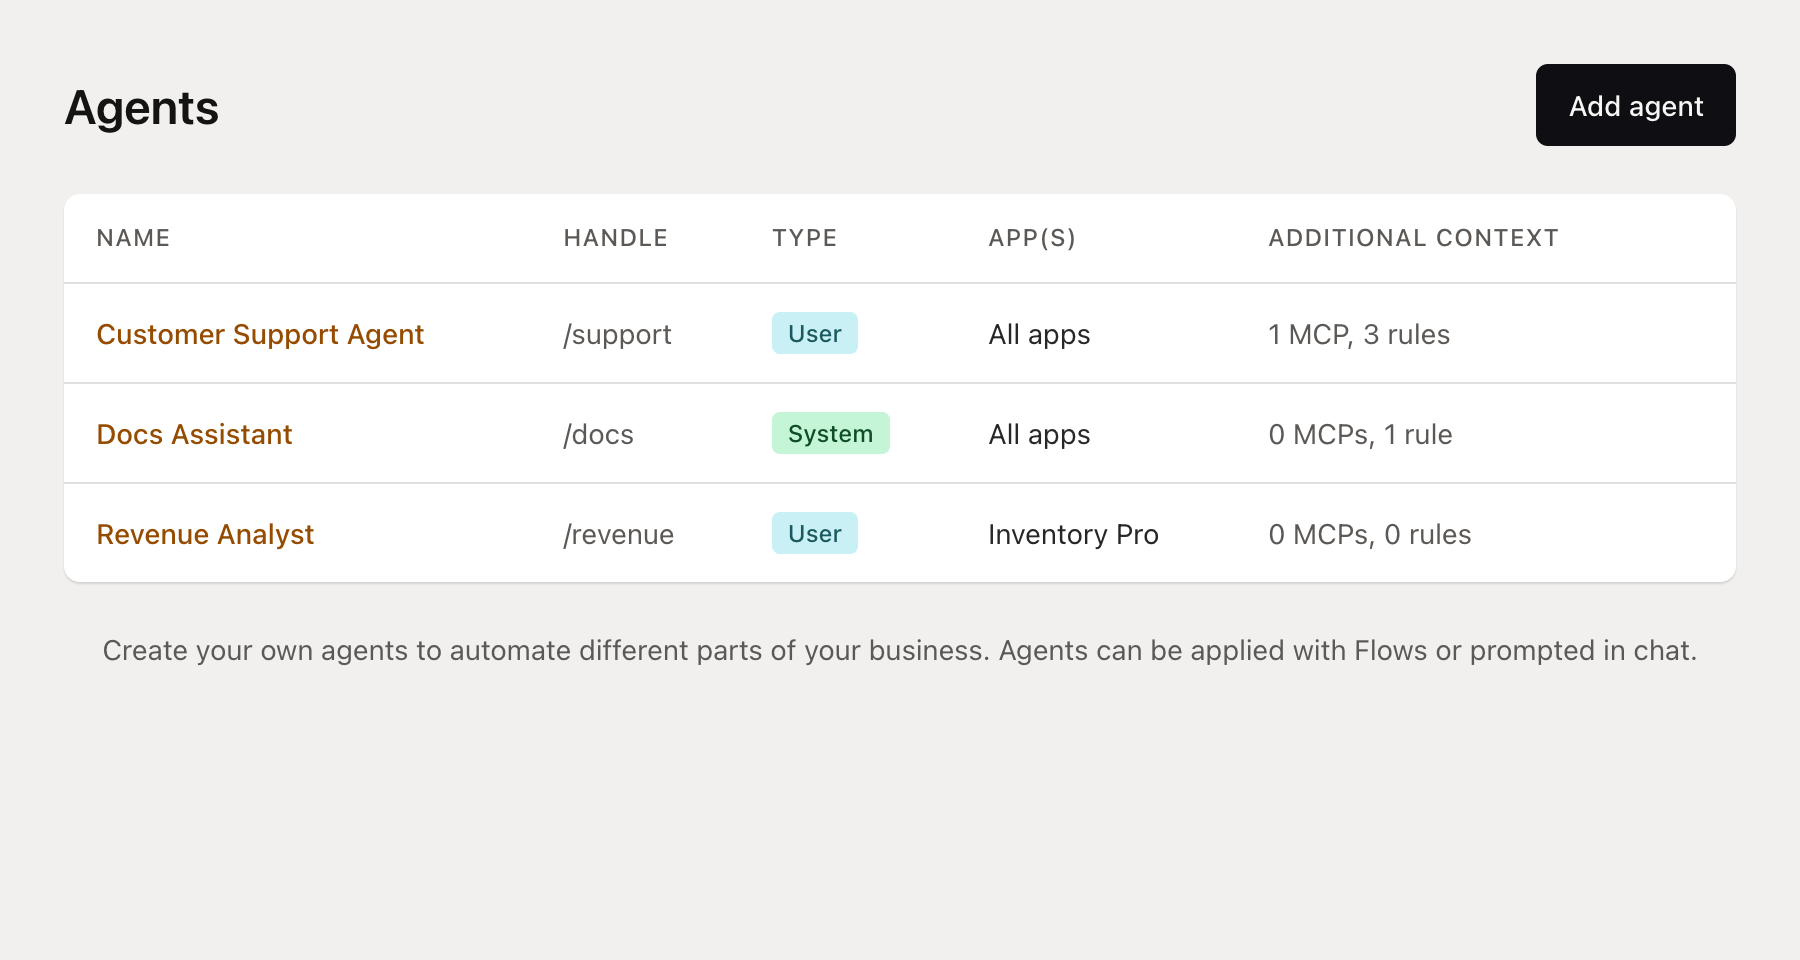
When you open Agents in your Mantle sidebar, you'll see the system agents available to your organization. These are ready to use out of the box:
Support Sidekick — Analyzes support tickets, researches your docs and codebase, and drafts responses for your team to review. Follows a structured workflow: gather context, research the issue, classify it, then draft a response or recommend escalation. See AI-Powered Support for details on how it works in the help desk.
Content Writer — Drafts documentation, help articles, and marketing content based on your product and existing docs.
Customer Insights — Answers questions about your customer data, metrics, and business health. Good for ad-hoc analysis.
Each system agent comes with a default mandate, recommended tools, and connections already set up. You can use them as-is or customize them to better fit your workflow.
Configuring an agent
Click on any agent to open its configuration page. Here you can customize how it works.
Mandate
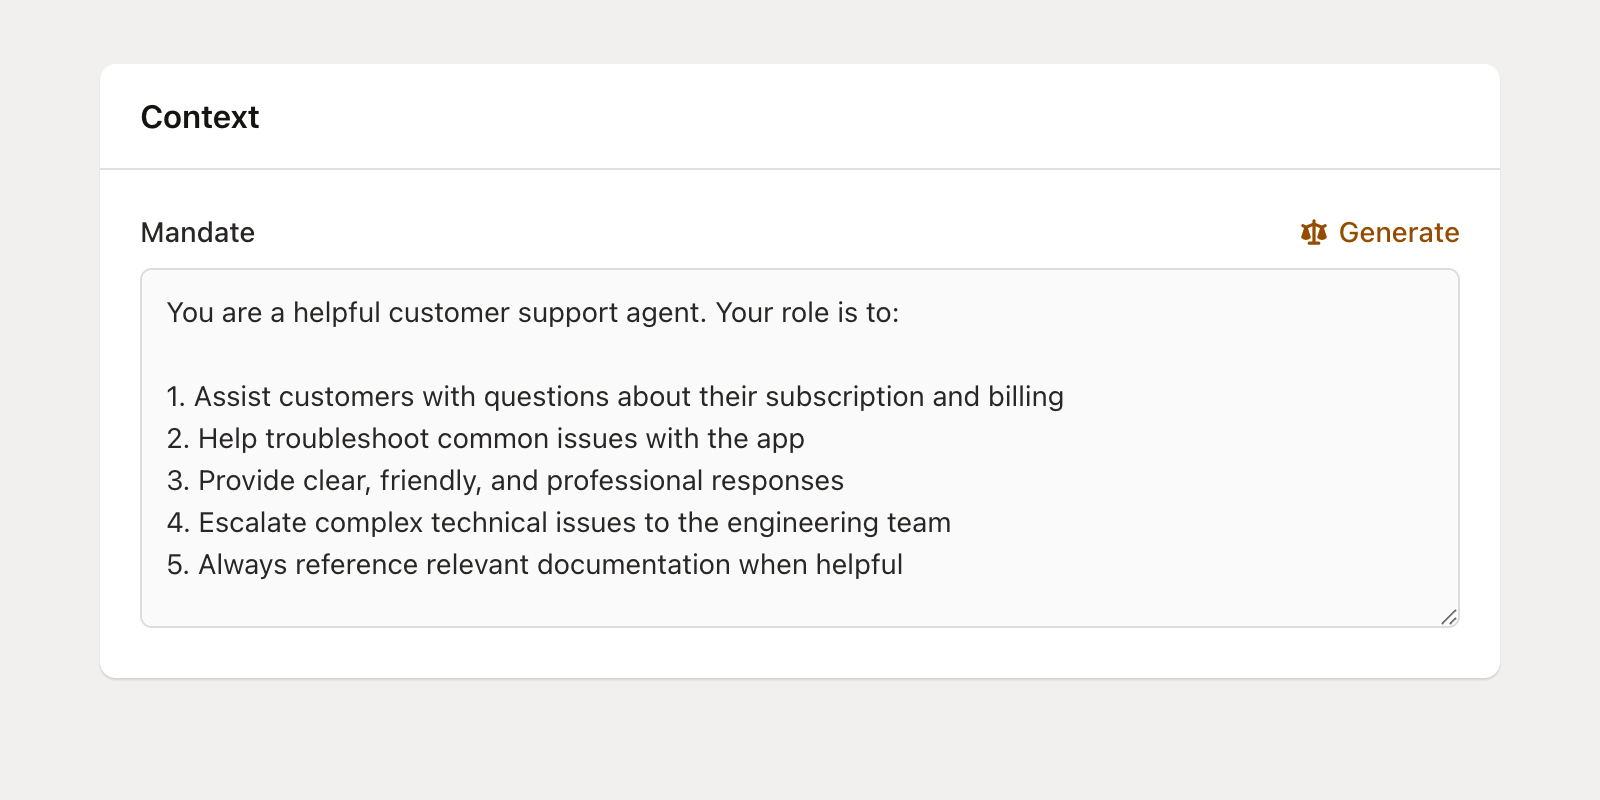
The mandate is the agent's job description—it defines what the agent should do and how it should behave. System agents come with default mandates that work well for most cases, but you can customize them to:
Match your company's tone and voice
Add specific guidelines for your product
Include examples of good responses
Set boundaries on what the agent should and shouldn't do
You can also click Generate to have AI help you write or refine the mandate. Describe what you want the agent to do, and Mantle generates a detailed mandate based on your description and any existing agents in your organization.
Tools
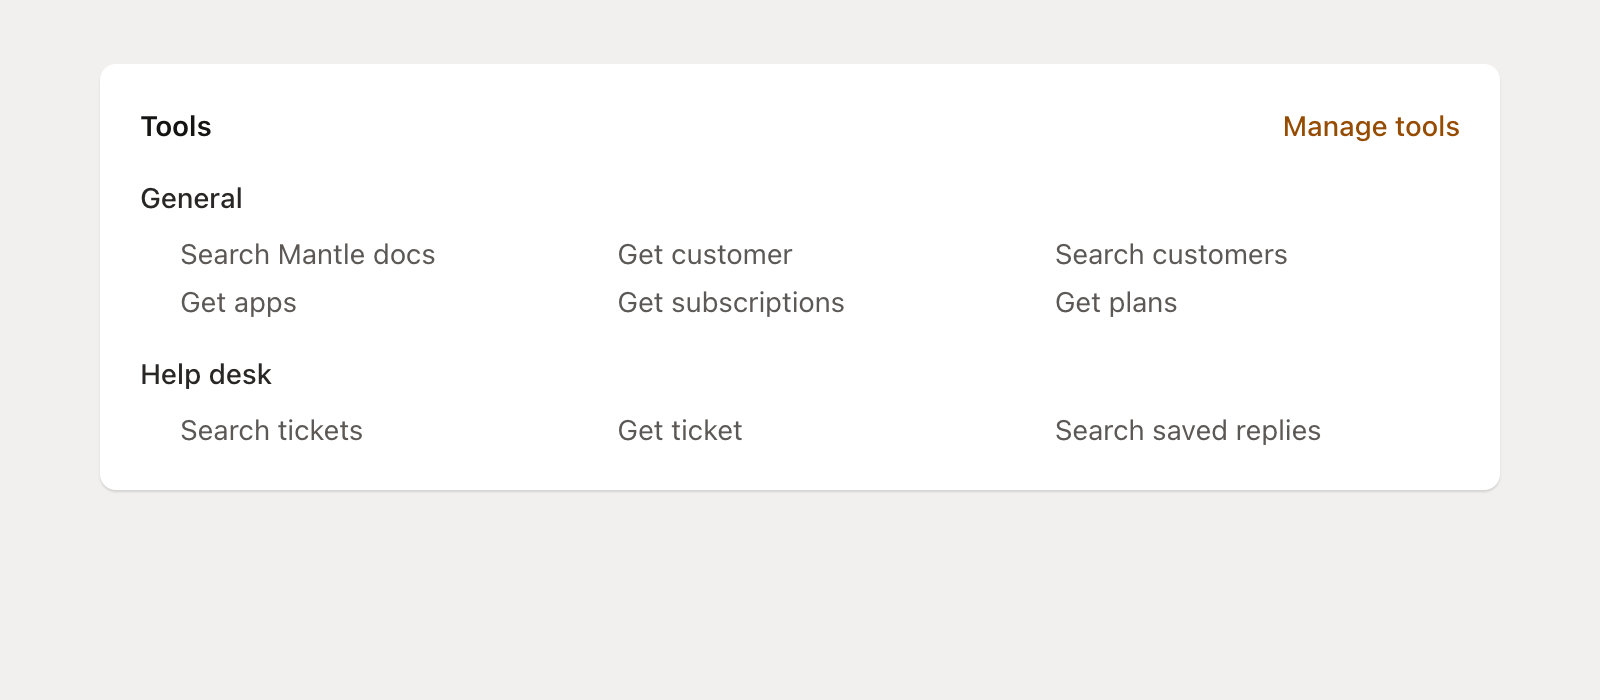
Tools give your agent capabilities—access to customer data, ability to run reports, create content, etc. Click Manage tools to see what's available.
Tools are organized by category:
Core — Customer data, subscriptions, plans, transactions, app events, deals, tasks
Metrics — Analytics and reporting (MRR, churn, growth, retention, traffic sources, funnel, reviews)
Help Desk — Search tickets, view ticket details, create internal notes, search saved replies
Flows — View and manage automation flows
Affiliates — Affiliate program management and payouts
Docs — Documentation management, page creation, publishing
In addition to category tools, agents have access to special Mantle tools:
Search docs — Search your published documentation
Create insight — Surface insights in the Mantle UI
Create ticket response suggestion — Draft a suggested reply for a support ticket
Create saved reply suggestion — Suggest new saved replies based on ticket patterns
Create docs suggestions — Generate documentation improvement suggestions
Email notify — Send email notifications to team members
Slack notify — Send notifications to Slack
Call sub-agent — Invoke another agent to handle a subtask
System agents come with relevant tools already enabled. You can add more if your agent needs additional capabilities, or remove tools to keep it focused.
Rules
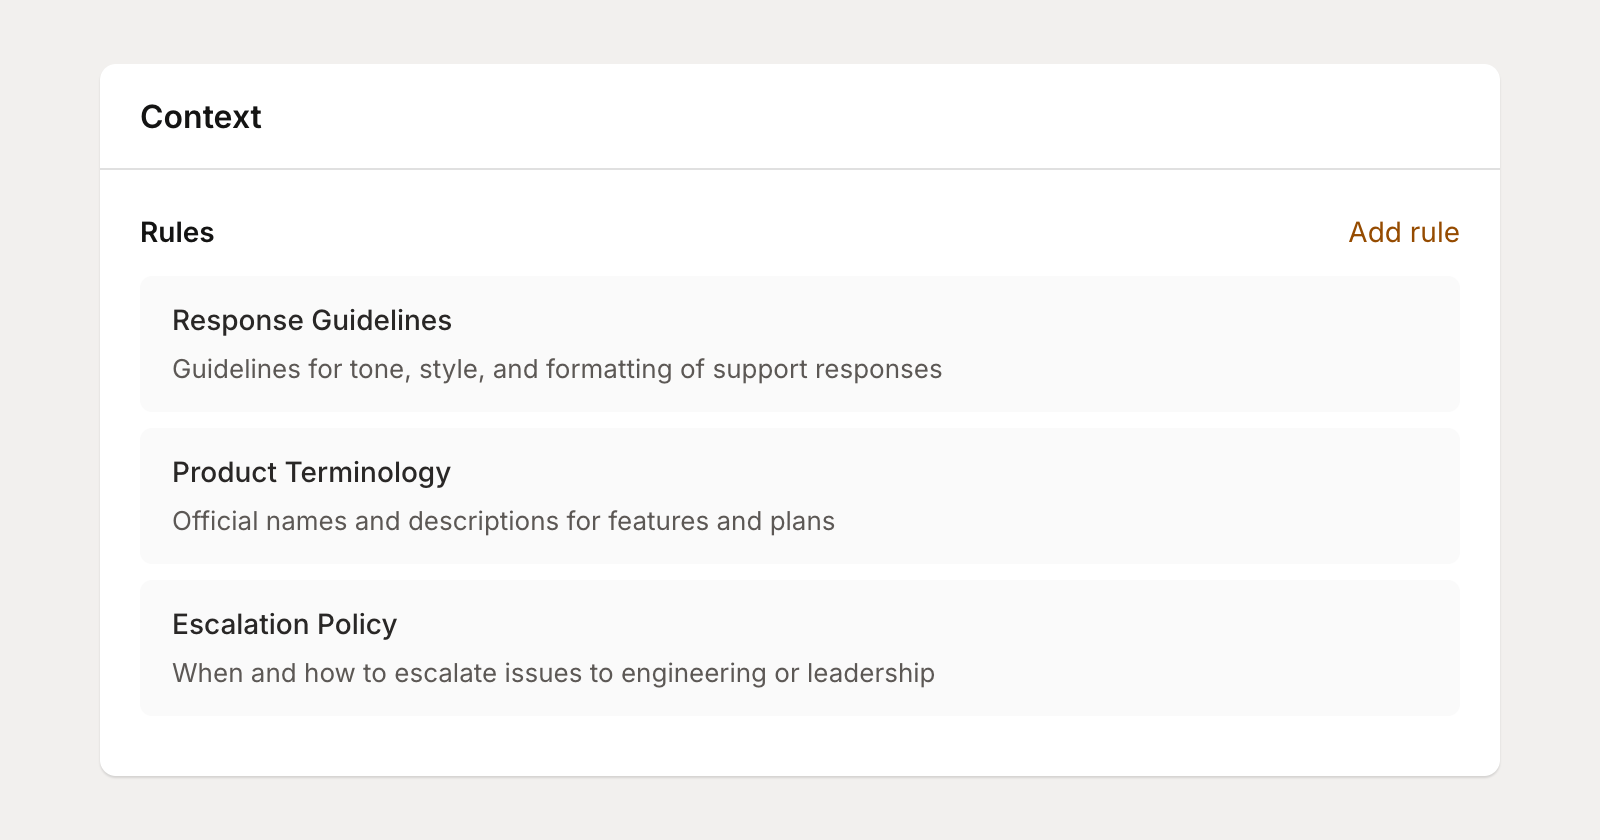
Rules are the primary way to customize how an agent behaves. While the mandate defines the agent's core identity and workflow, rules let you layer on your specific requirements without changing the underlying agent. Use them for:
Your company's tone, voice, and communication style
Escalation protocols (when to hand off to a human, business hours, etc.)
Things the agent should never do (offer refunds, speculate on roadmap, etc.)
Product-specific knowledge and terminology
Edge cases and how to handle them
Response formatting requirements
Click Add rule to create one. Each rule has a name and description that helps the agent decide when to reference it.
When the agent runs, it intelligently selects which rules are relevant to the current task. If you have only a few rules, it loads them all. With more rules, it uses the name and description to pick the most applicable ones and keeps the rest available on demand.
Codebase access
For technical products, connecting your codebase lets agents understand your actual implementation. When customers ask technical questions or report bugs, agents can search your code to provide accurate answers.
Codebases are connected at the app level, not directly on individual agents. To connect a codebase:
Go to Apps > select your app > Settings
Find the Codebase card and click Connect codebase
Choose GitHub, GitLab, or Upload (ZIP file)
Once a codebase is connected to an app, you can grant agents access to it. On the agent configuration page, the Codebase access section shows all apps that have a codebase connected. Select the apps whose codebases this agent should be able to search.
This means multiple agents can share the same codebase without connecting it separately for each one, and you manage all codebase connections from one place.
With codebase access enabled, the agent gets access to multiple search tools:
Semantic search — Find code by meaning (e.g., "where is payment processing handled?")
Text search — Find specific function names, error messages, or patterns
Hybrid search — Combine both approaches
File browsing — List files, view structure, find references and definitions
Mantle supports a wide range of languages including JavaScript, TypeScript, Python, Java, Go, Rust, Ruby, PHP, C#, Swift, and many more.
External MCPs
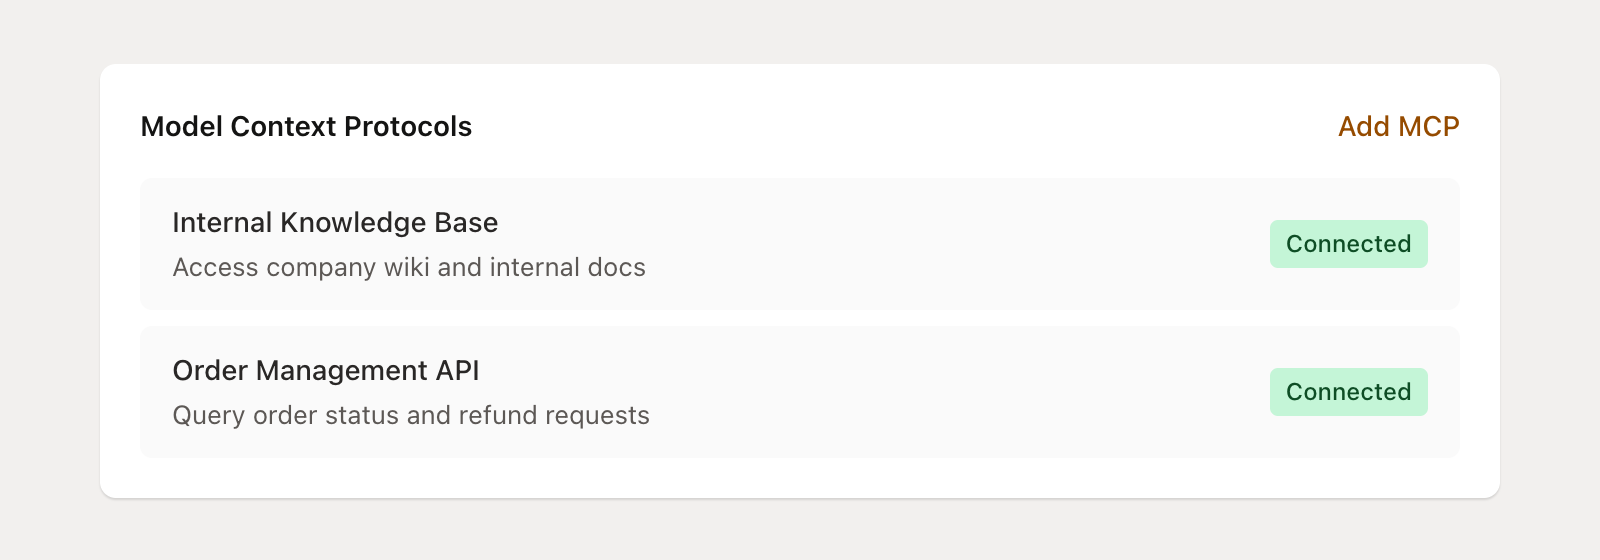
If you want your agent to access data beyond Mantle, you can connect external Model Context Protocols (MCPs). These let your agent access:
Your own app's API
Third-party tools (CRMs, helpdesks, etc.)
Internal systems and databases
Click Add MCP and provide the server URL and authentication details. Credentials are stored with field-level encryption.
Visibility
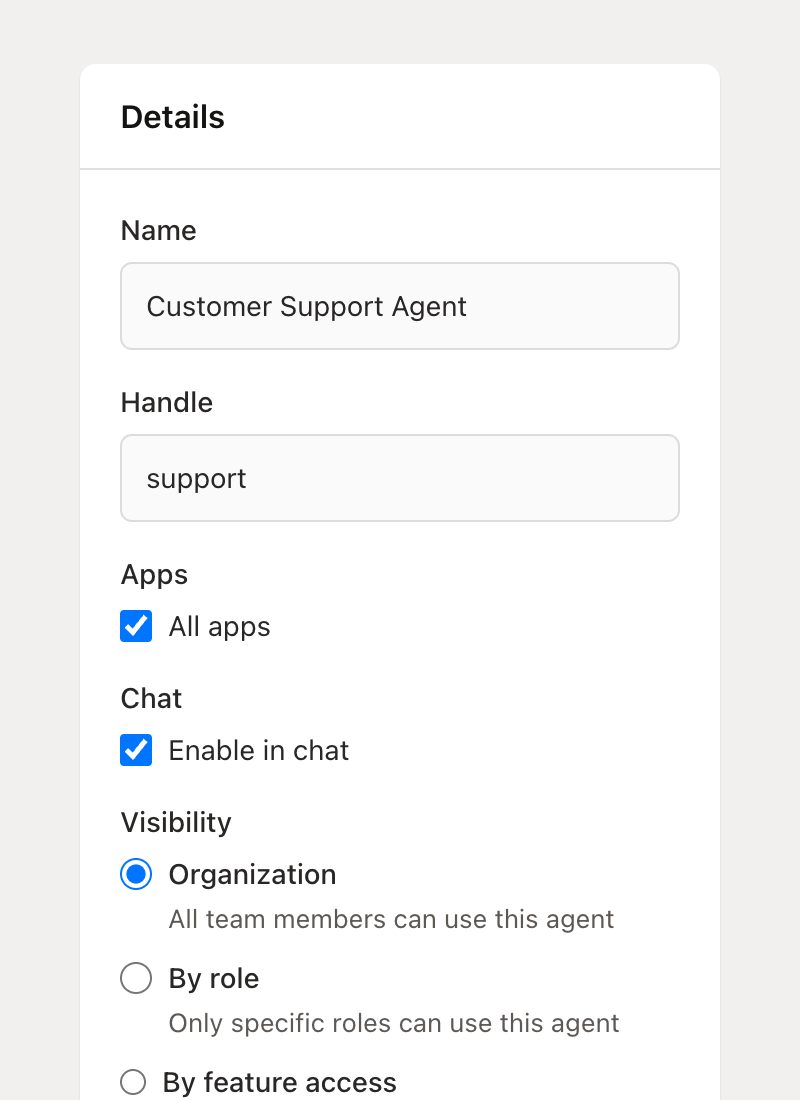
Control who on your team can see and use this agent. In the Details sidebar, find the Visibility section:
Organization — Anyone in your organization can use this agent
By role — Only team members with specific roles (Owner, Admin, Member)
By feature access — Only users with access to specific Mantle features
Private — Only you can see and use this agent
Agent jobs
Agent jobs let you schedule your agents to run automatically or trigger them on specific events—without setting up a full Flow.
Each job has:
Triggers — When the job runs. Options include scheduled (daily/weekly at a specific time and timezone) or event-based (e.g., when a customer uninstalls, a ticket is created, etc.)
Instructions — What the agent should do when the job runs. This is separate from the mandate—it's the specific task for this job.
Actions — What happens after the agent finishes. Options include creating insights, generating ticket response suggestions, sending email notifications, or posting to Slack.
For example, you could create a job that:
Runs every Monday morning at 7 AM
Tells the agent to "Analyze this week's support tickets and identify the top 3 recurring issues"
Sends the result as an email to your support lead
Or an event-triggered job that:
Fires when a customer uninstalls your app
Tells the agent to "Analyze this customer's recent tickets and usage to identify why they may have left"
Posts the findings to a Slack channel
Creating a custom agent
While system agents cover most common use cases, you can create custom agents for specialized needs. Click Add agent from the Agents page.
Keep in mind that custom agents start from scratch. Unlike system agents, they don't come with a pre-built mandate, so you'll need to write one yourself. This gives you full control, but also means more setup work. If your use case overlaps with a system agent (e.g., support, content, analytics), you'll usually get better results faster by customizing the system agent with rules rather than building a new one.
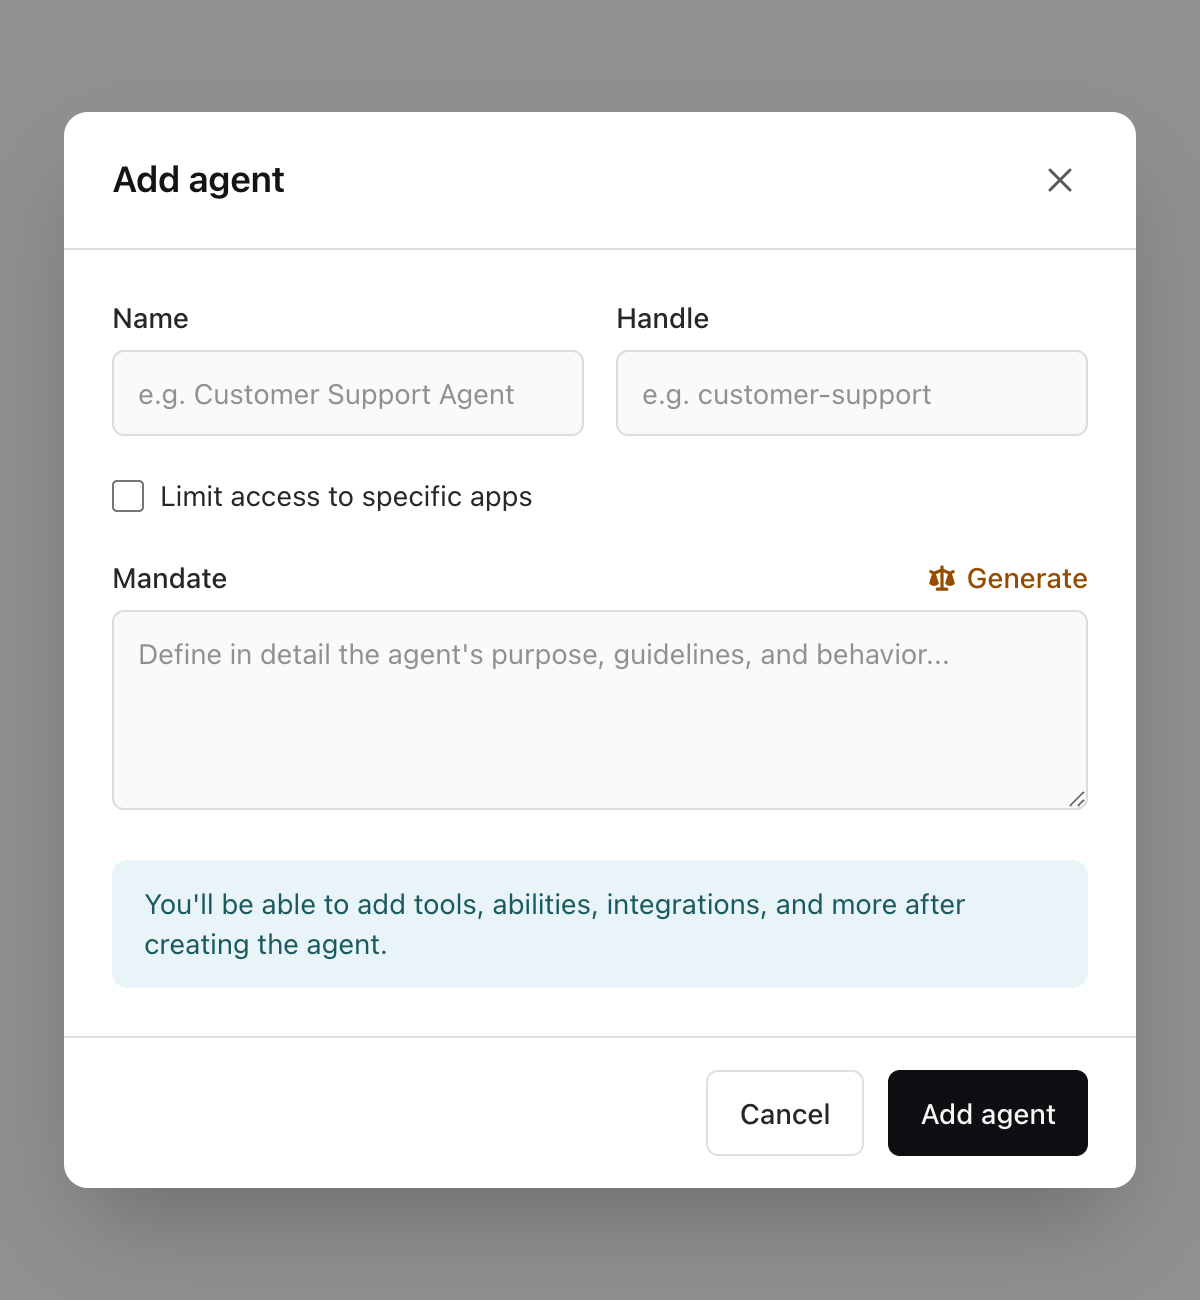
You'll need to provide:
Name — Something descriptive like "Onboarding Specialist" or "Churn Analyzer"
Handle — A short identifier for chat shortcuts (e.g.,
/onboard)Apps — Choose whether the agent can access all apps or specific ones
Mandate — Define the agent's purpose and behavior
After creating, configure tools, rules, and connections as described above.
Using your agents
Once configured, you can use agents in multiple ways:
Mantle chat — Use the handle shortcut (e.g.,
/support) to switch to an agent in the chat interfaceFlows — Add agents as actions in automation flows to analyze data and make decisions
Agent jobs — Schedule agents to run on a timer or in response to events
Help desk — The Support Sidekick runs directly from the ticket sidebar
External tools — Connect via MCP to Cursor, Claude Desktop, or other AI tools
Learn more: Using agents in Flows
Tips for getting the most out of agents
Start with system agents — They've been designed and tested by Mantle for common tasks. Customize them with rules rather than starting from scratch.
Use rules to customize behavior — Rules are the easiest way to shape how an agent behaves. Add your tone guidelines, escalation protocols, and constraints as rules rather than rewriting the mandate.
Customize the mandate — Add your company voice, product context, and specific guidelines. The more detail you provide, the better the agent performs.
Use Generate to get started — If writing a mandate from scratch feels daunting, describe what you want and let AI draft it for you.
Connect your codebase — For technical products, this dramatically improves accuracy for bug investigations and how-to questions. Connect a codebase from your app's settings page, then grant your agents access.
Use the debugger before going live — Test with real ticket and customer data in the debugger before enabling automated responses.
Check activity regularly — Review the usage logs to see how the agent performs and catch issues early.
Iterate over time — Refine mandates and rules based on what works. Good agents are built through iteration, not in one shot.
AI-Powered Support — How the Support Sidekick works in the help desk
Agent use cases — Real examples of agents in action
What's in an agent — Understanding mandates, tools, rules, and more